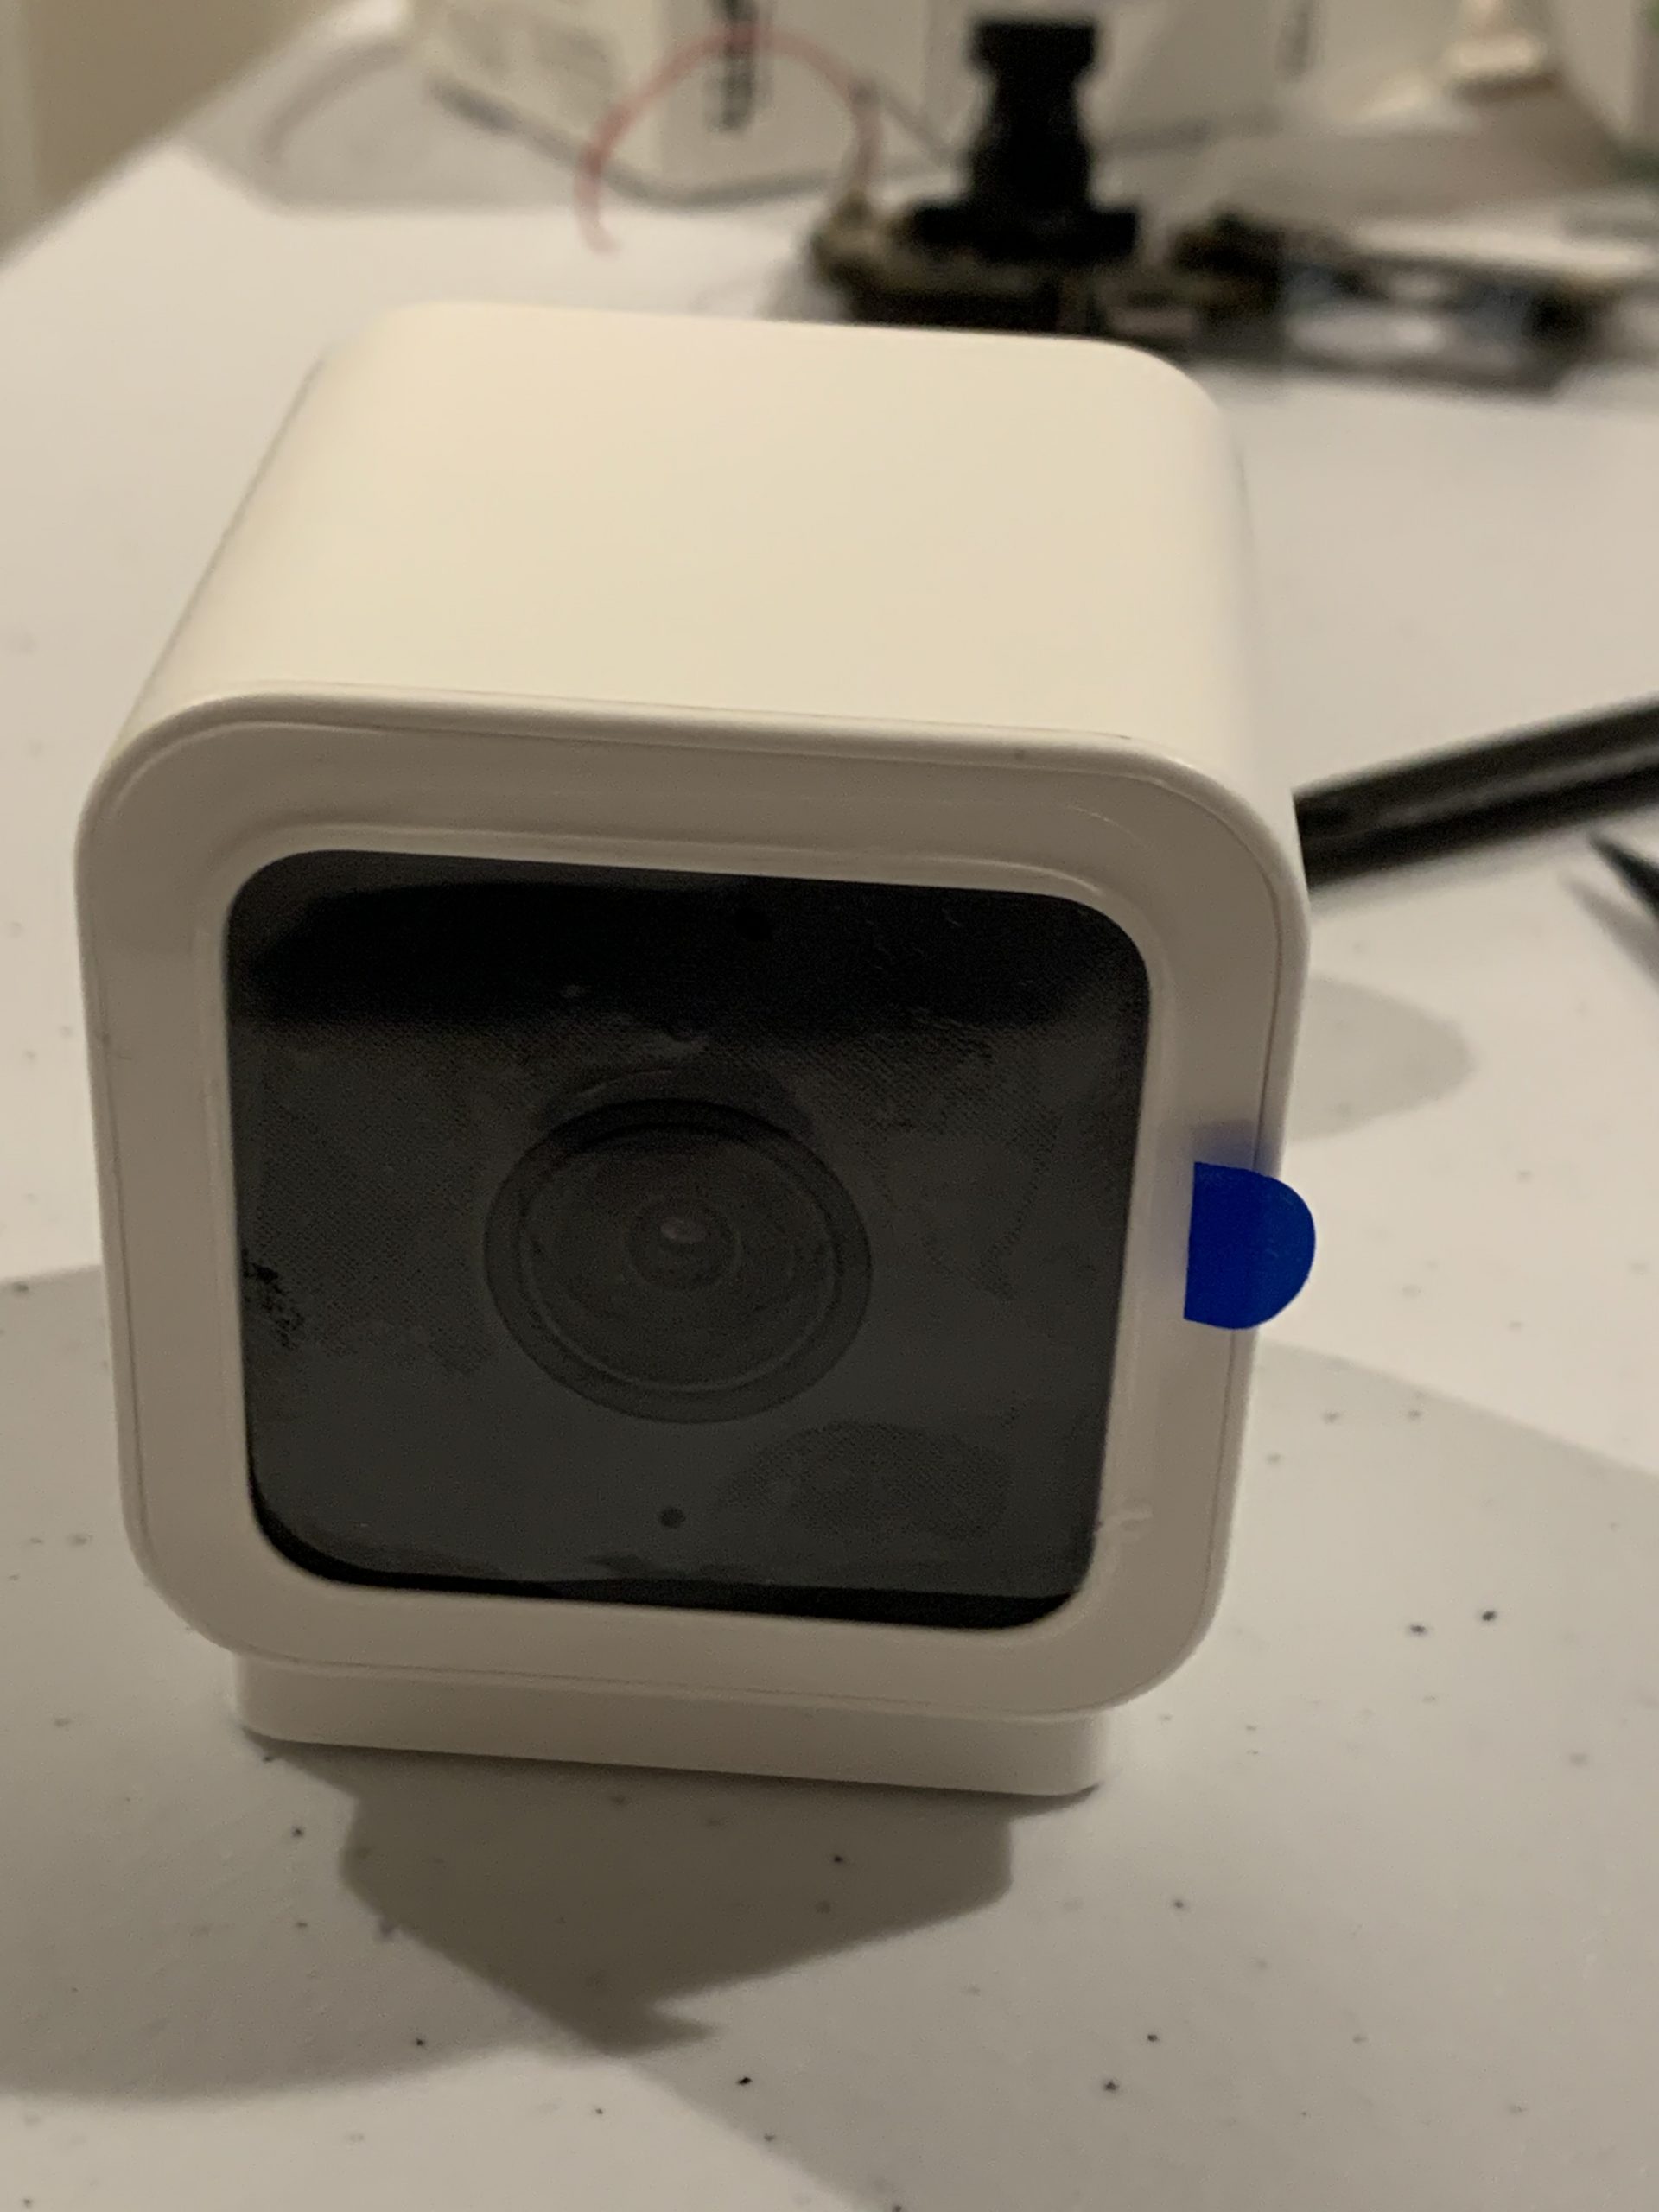
The Wyzecam v3 comes with some great features – namely the $20 price tag and excellent starlight sensor. It also comes with a microphone and speaker – both of which have their downsides. For those that wish to disconnect them (say, for privacy reasons) — and don’t fully trust the software “disable” — one can physically disconnect them without damaging the camera.
NOTE: if you plan to disconnect the speaker you should probably do this only AFTER setting up the camera, as it provides voice prompts during the setup.
Estimated time: This takes less than 5 minutes.
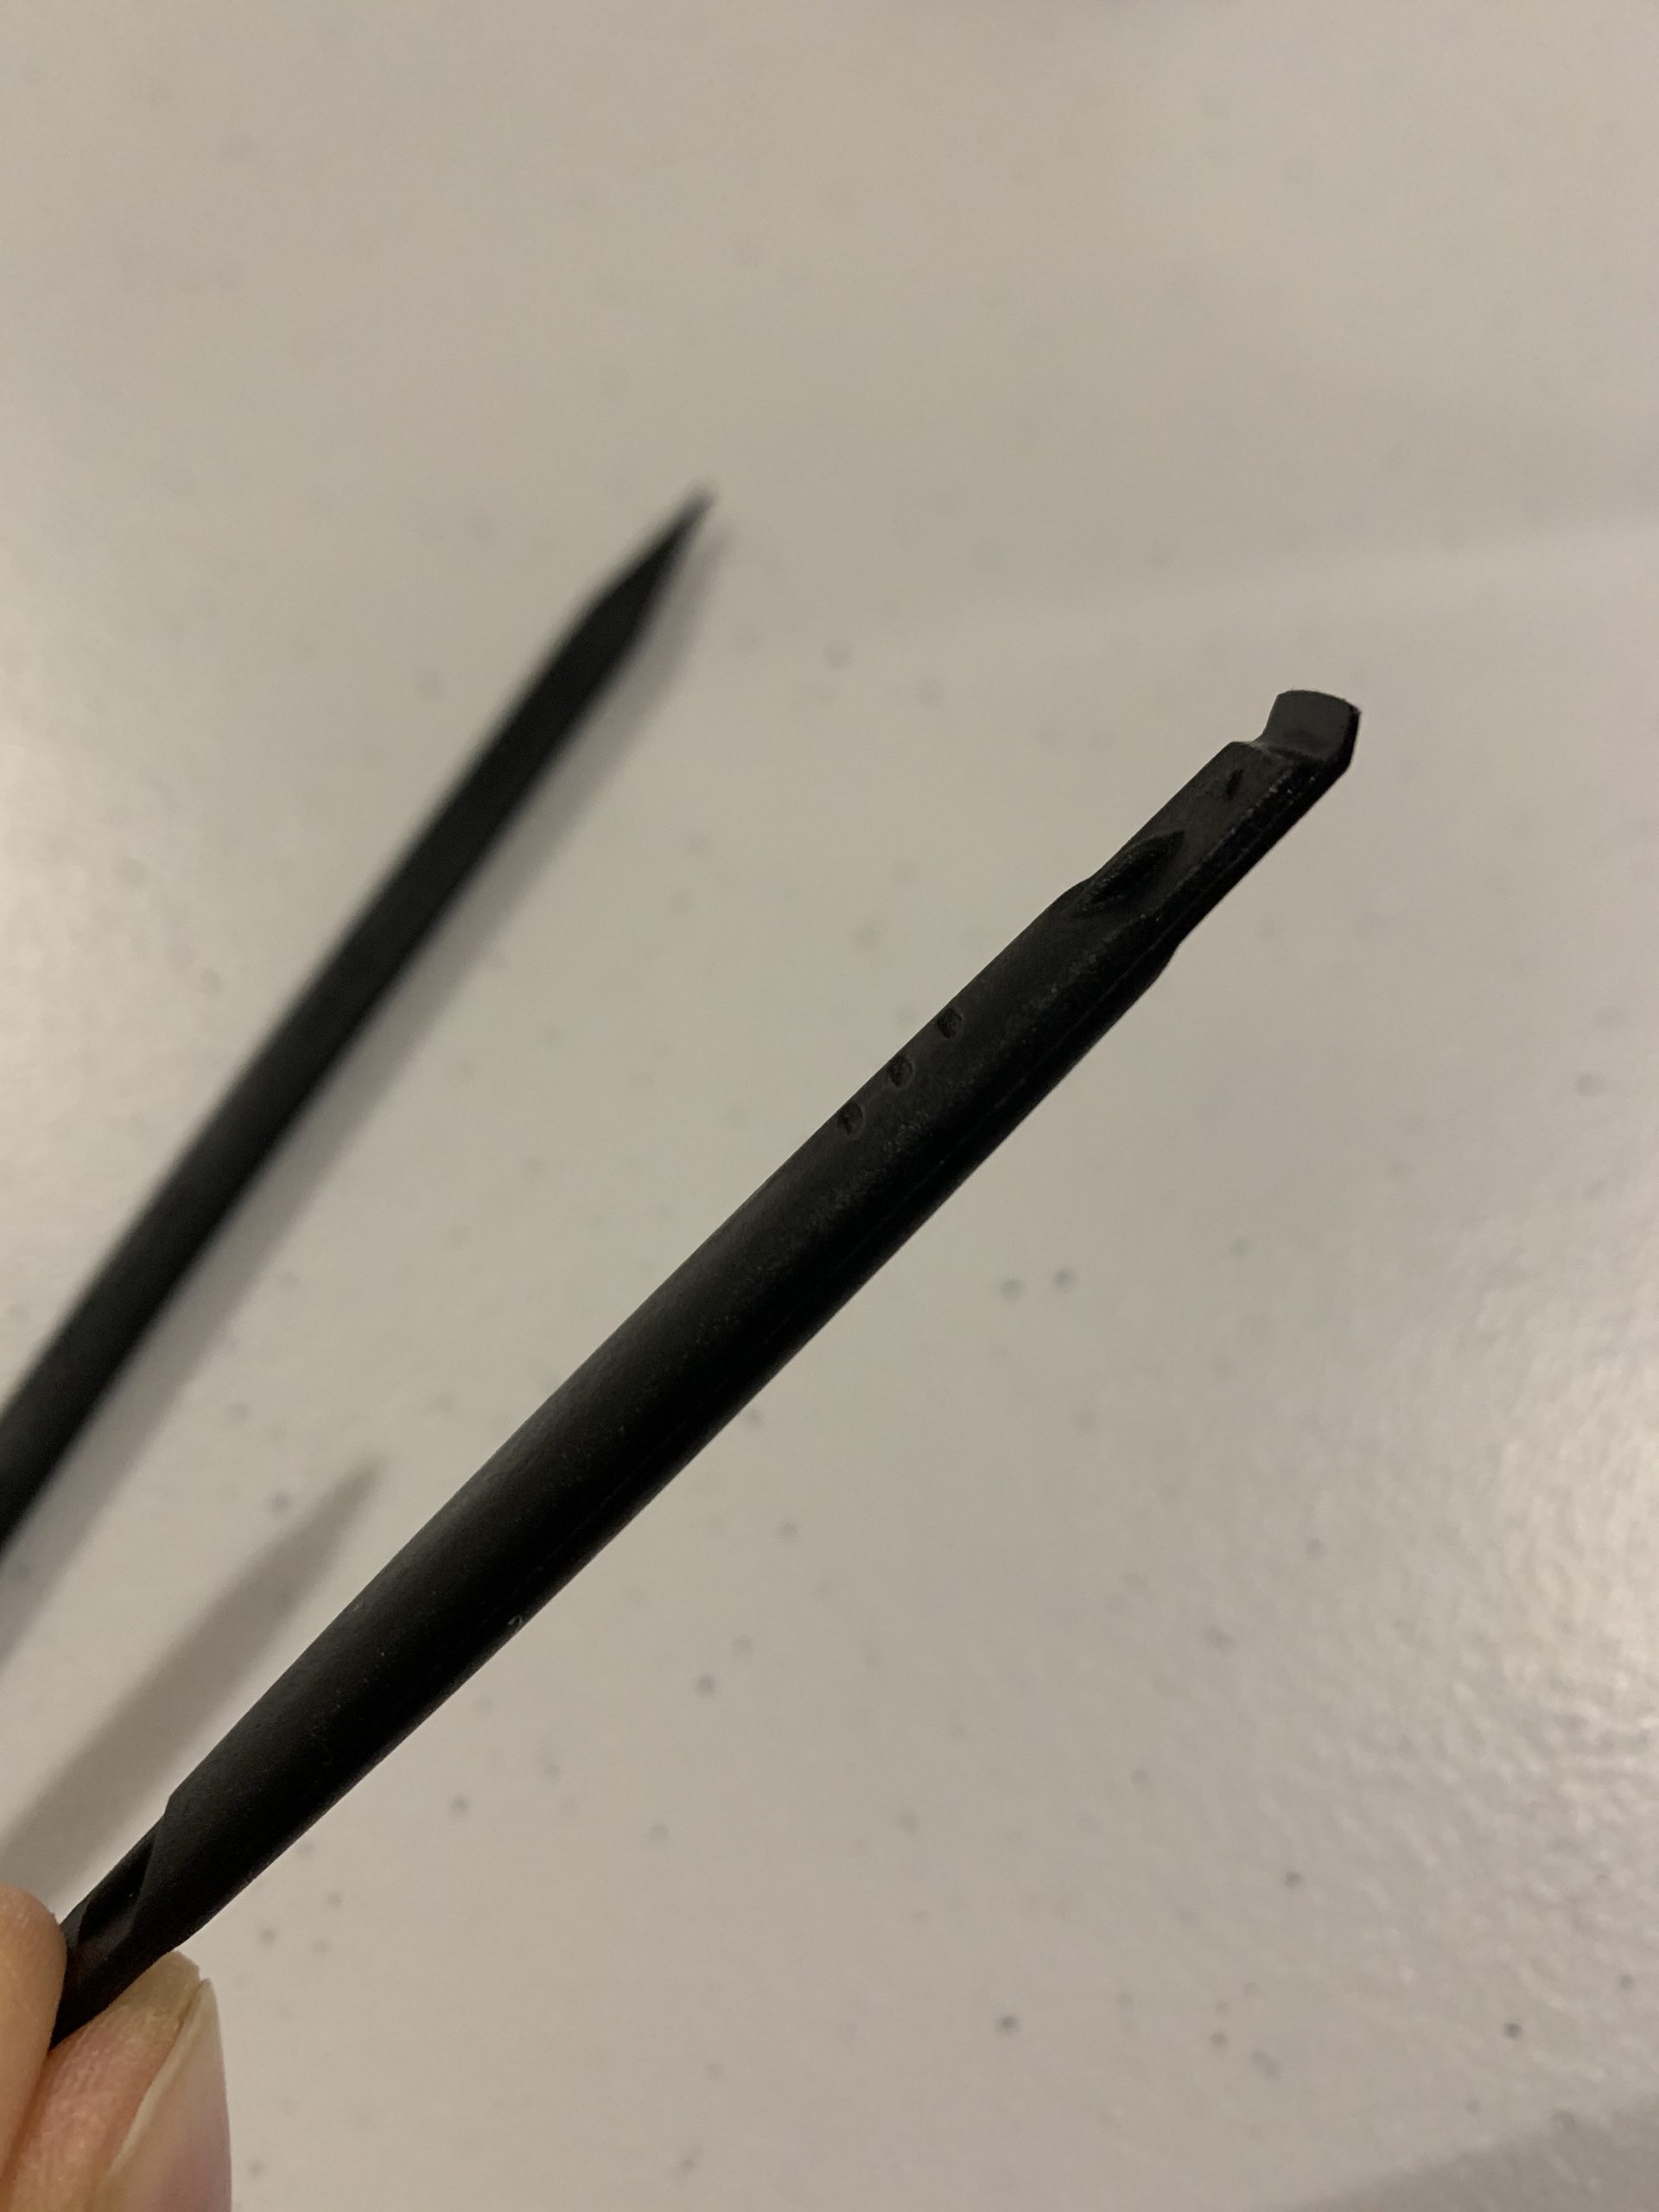
Step 1 – Use a plastic spudger such as this one for $1.99 from ifixit

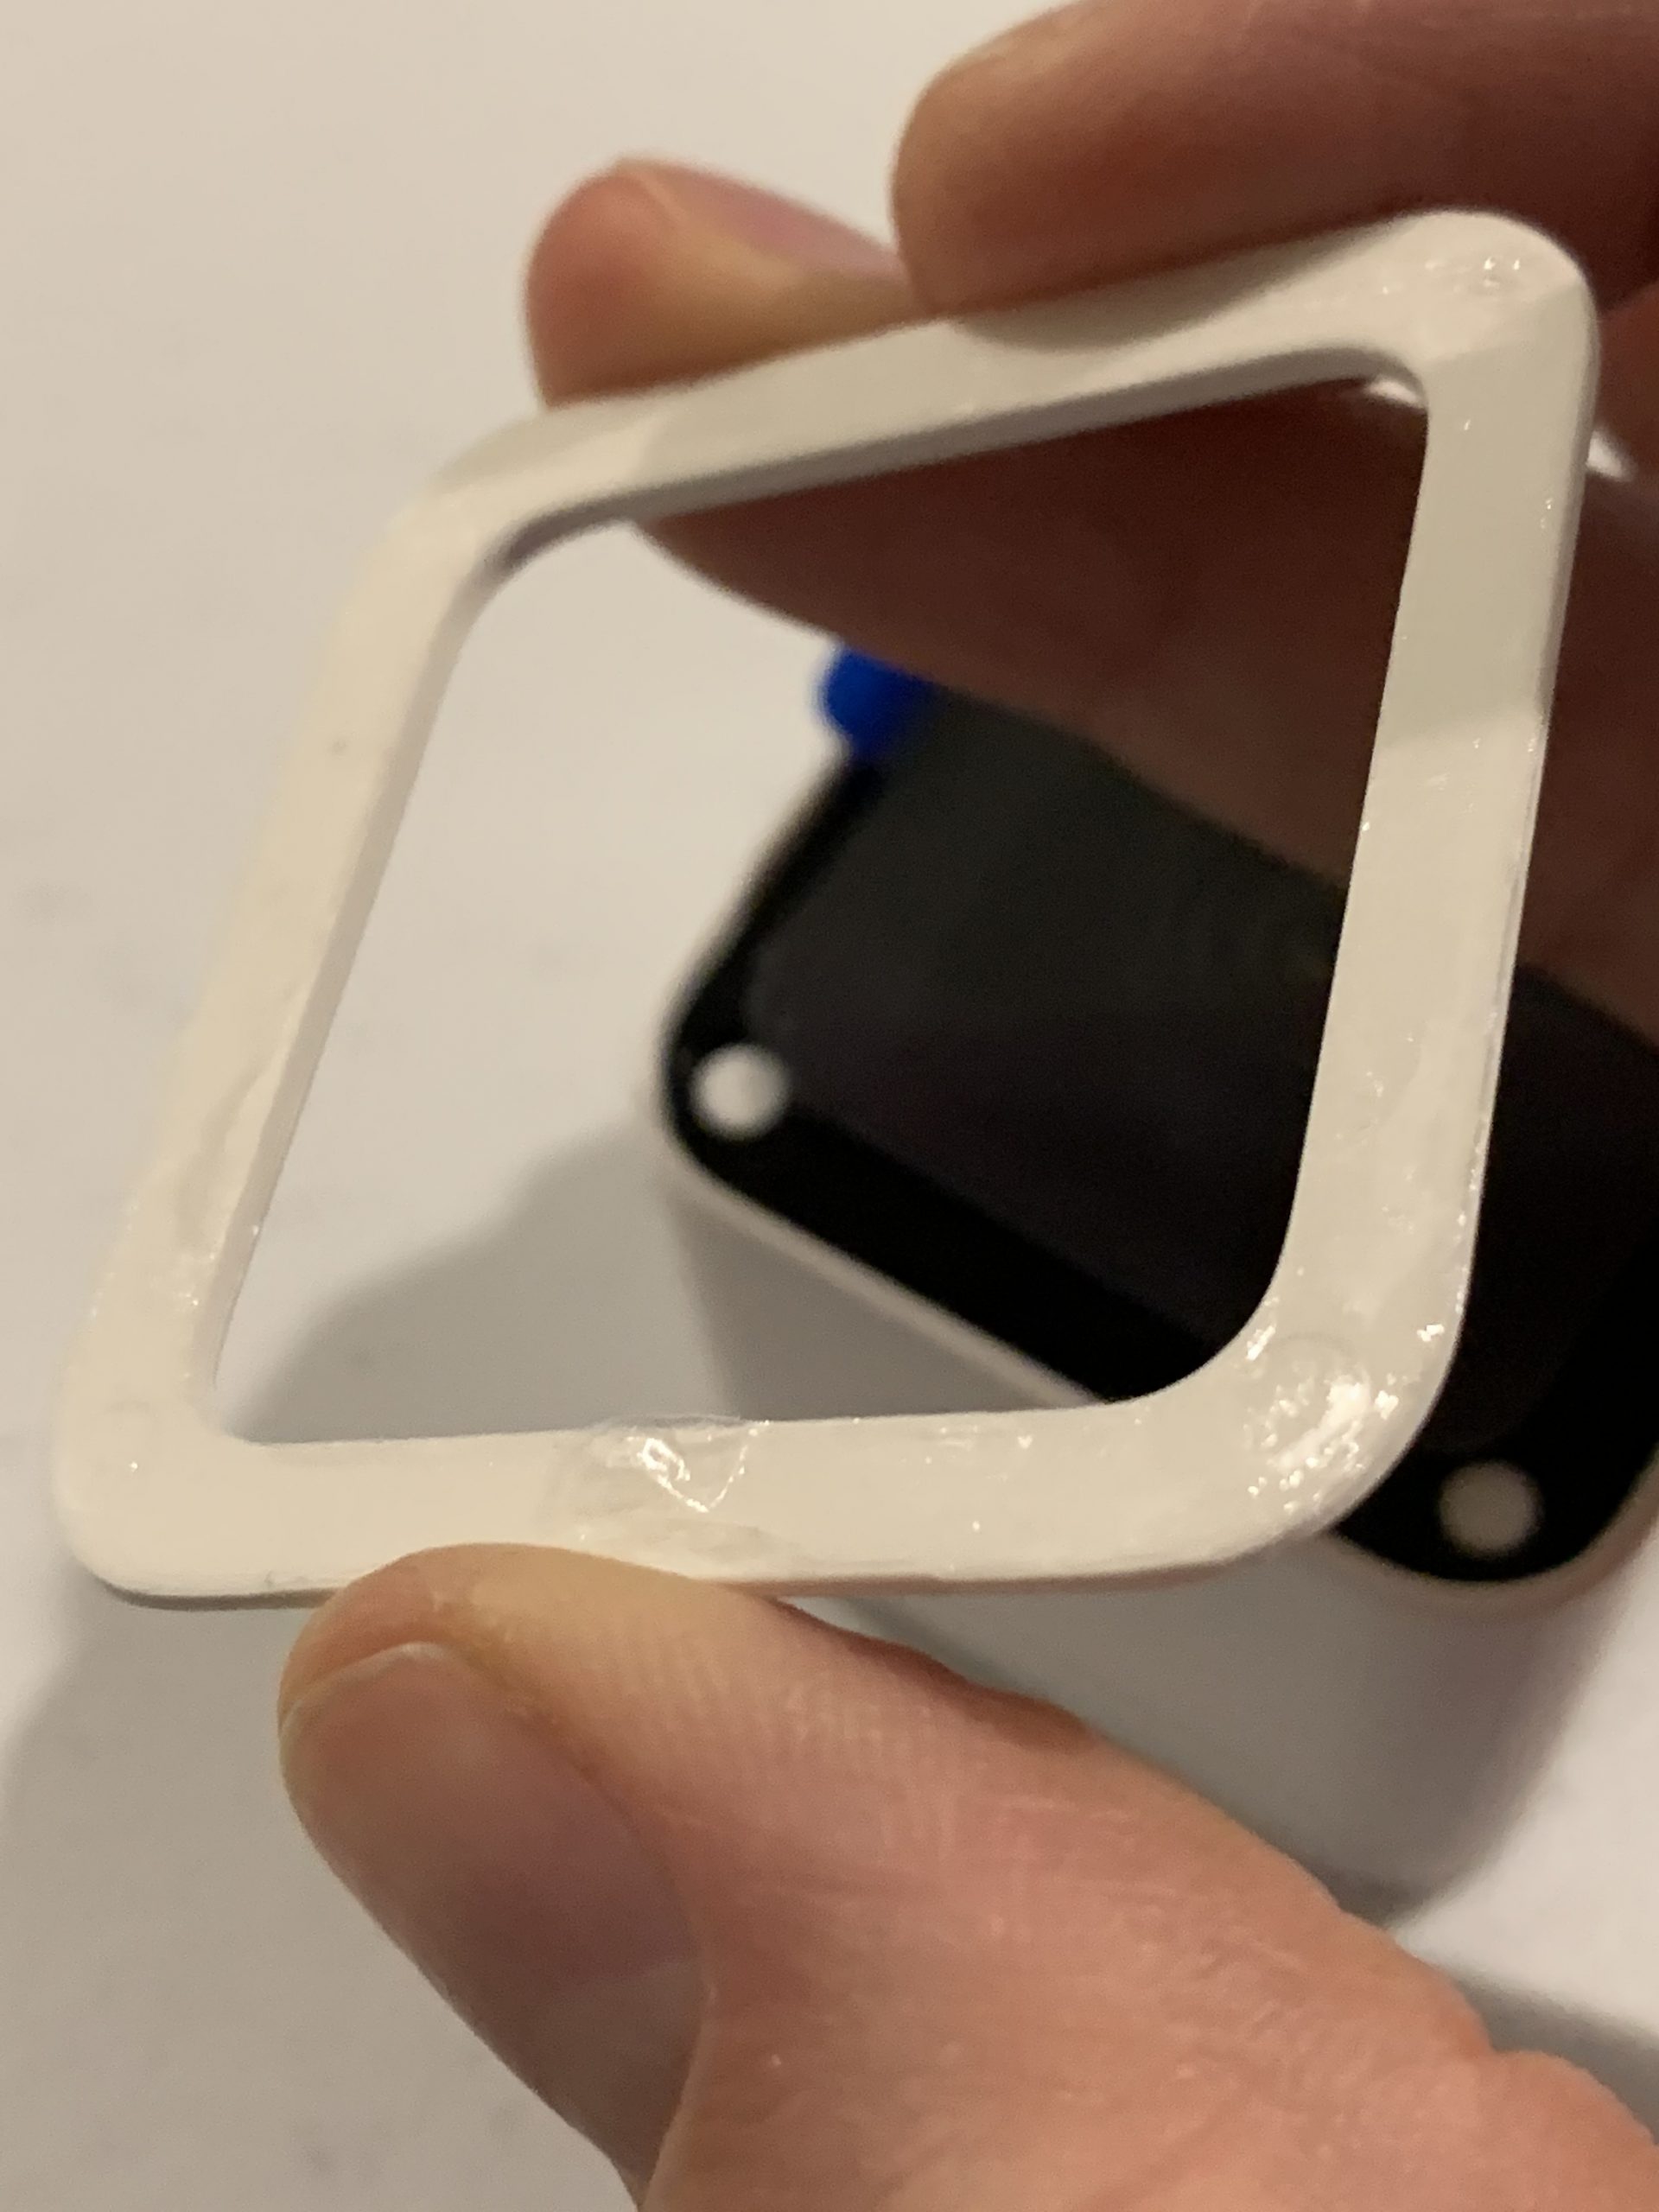
Step 2 – Guide the spudger under the outside of the white rim on the front of the camera. Run it around the ENTIRE white rim to loosen the underlying adhesive. Be careful not to push it too far under the rim as it will mar the adhesive tape and thereby decrease re-assembly quality.
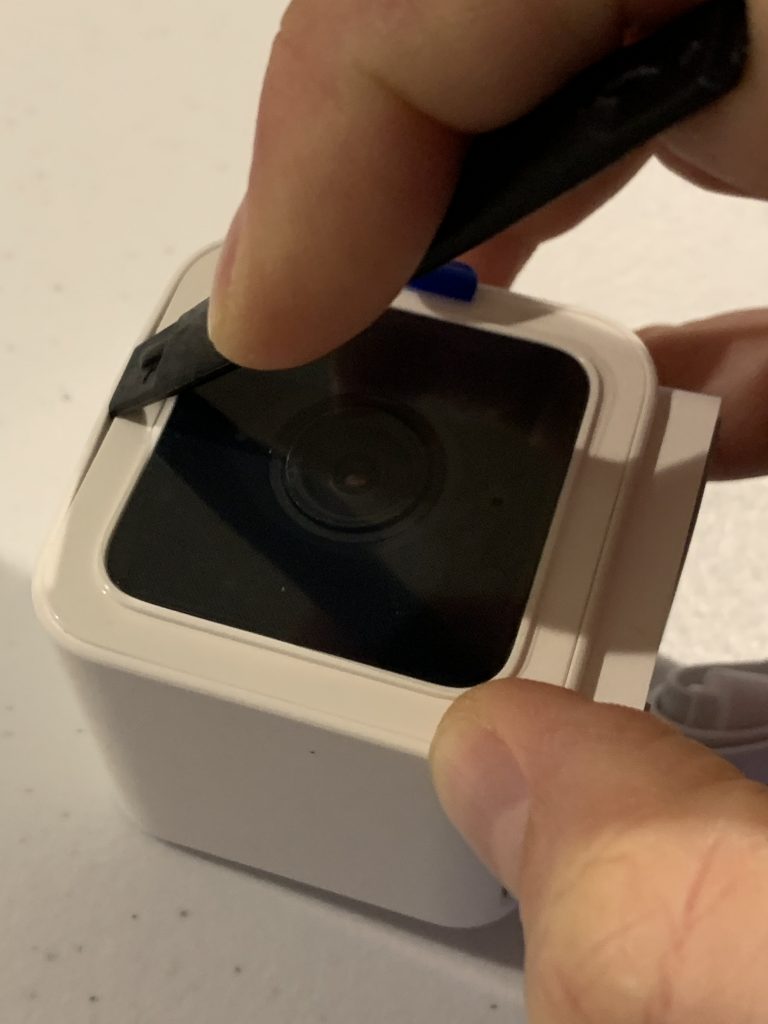

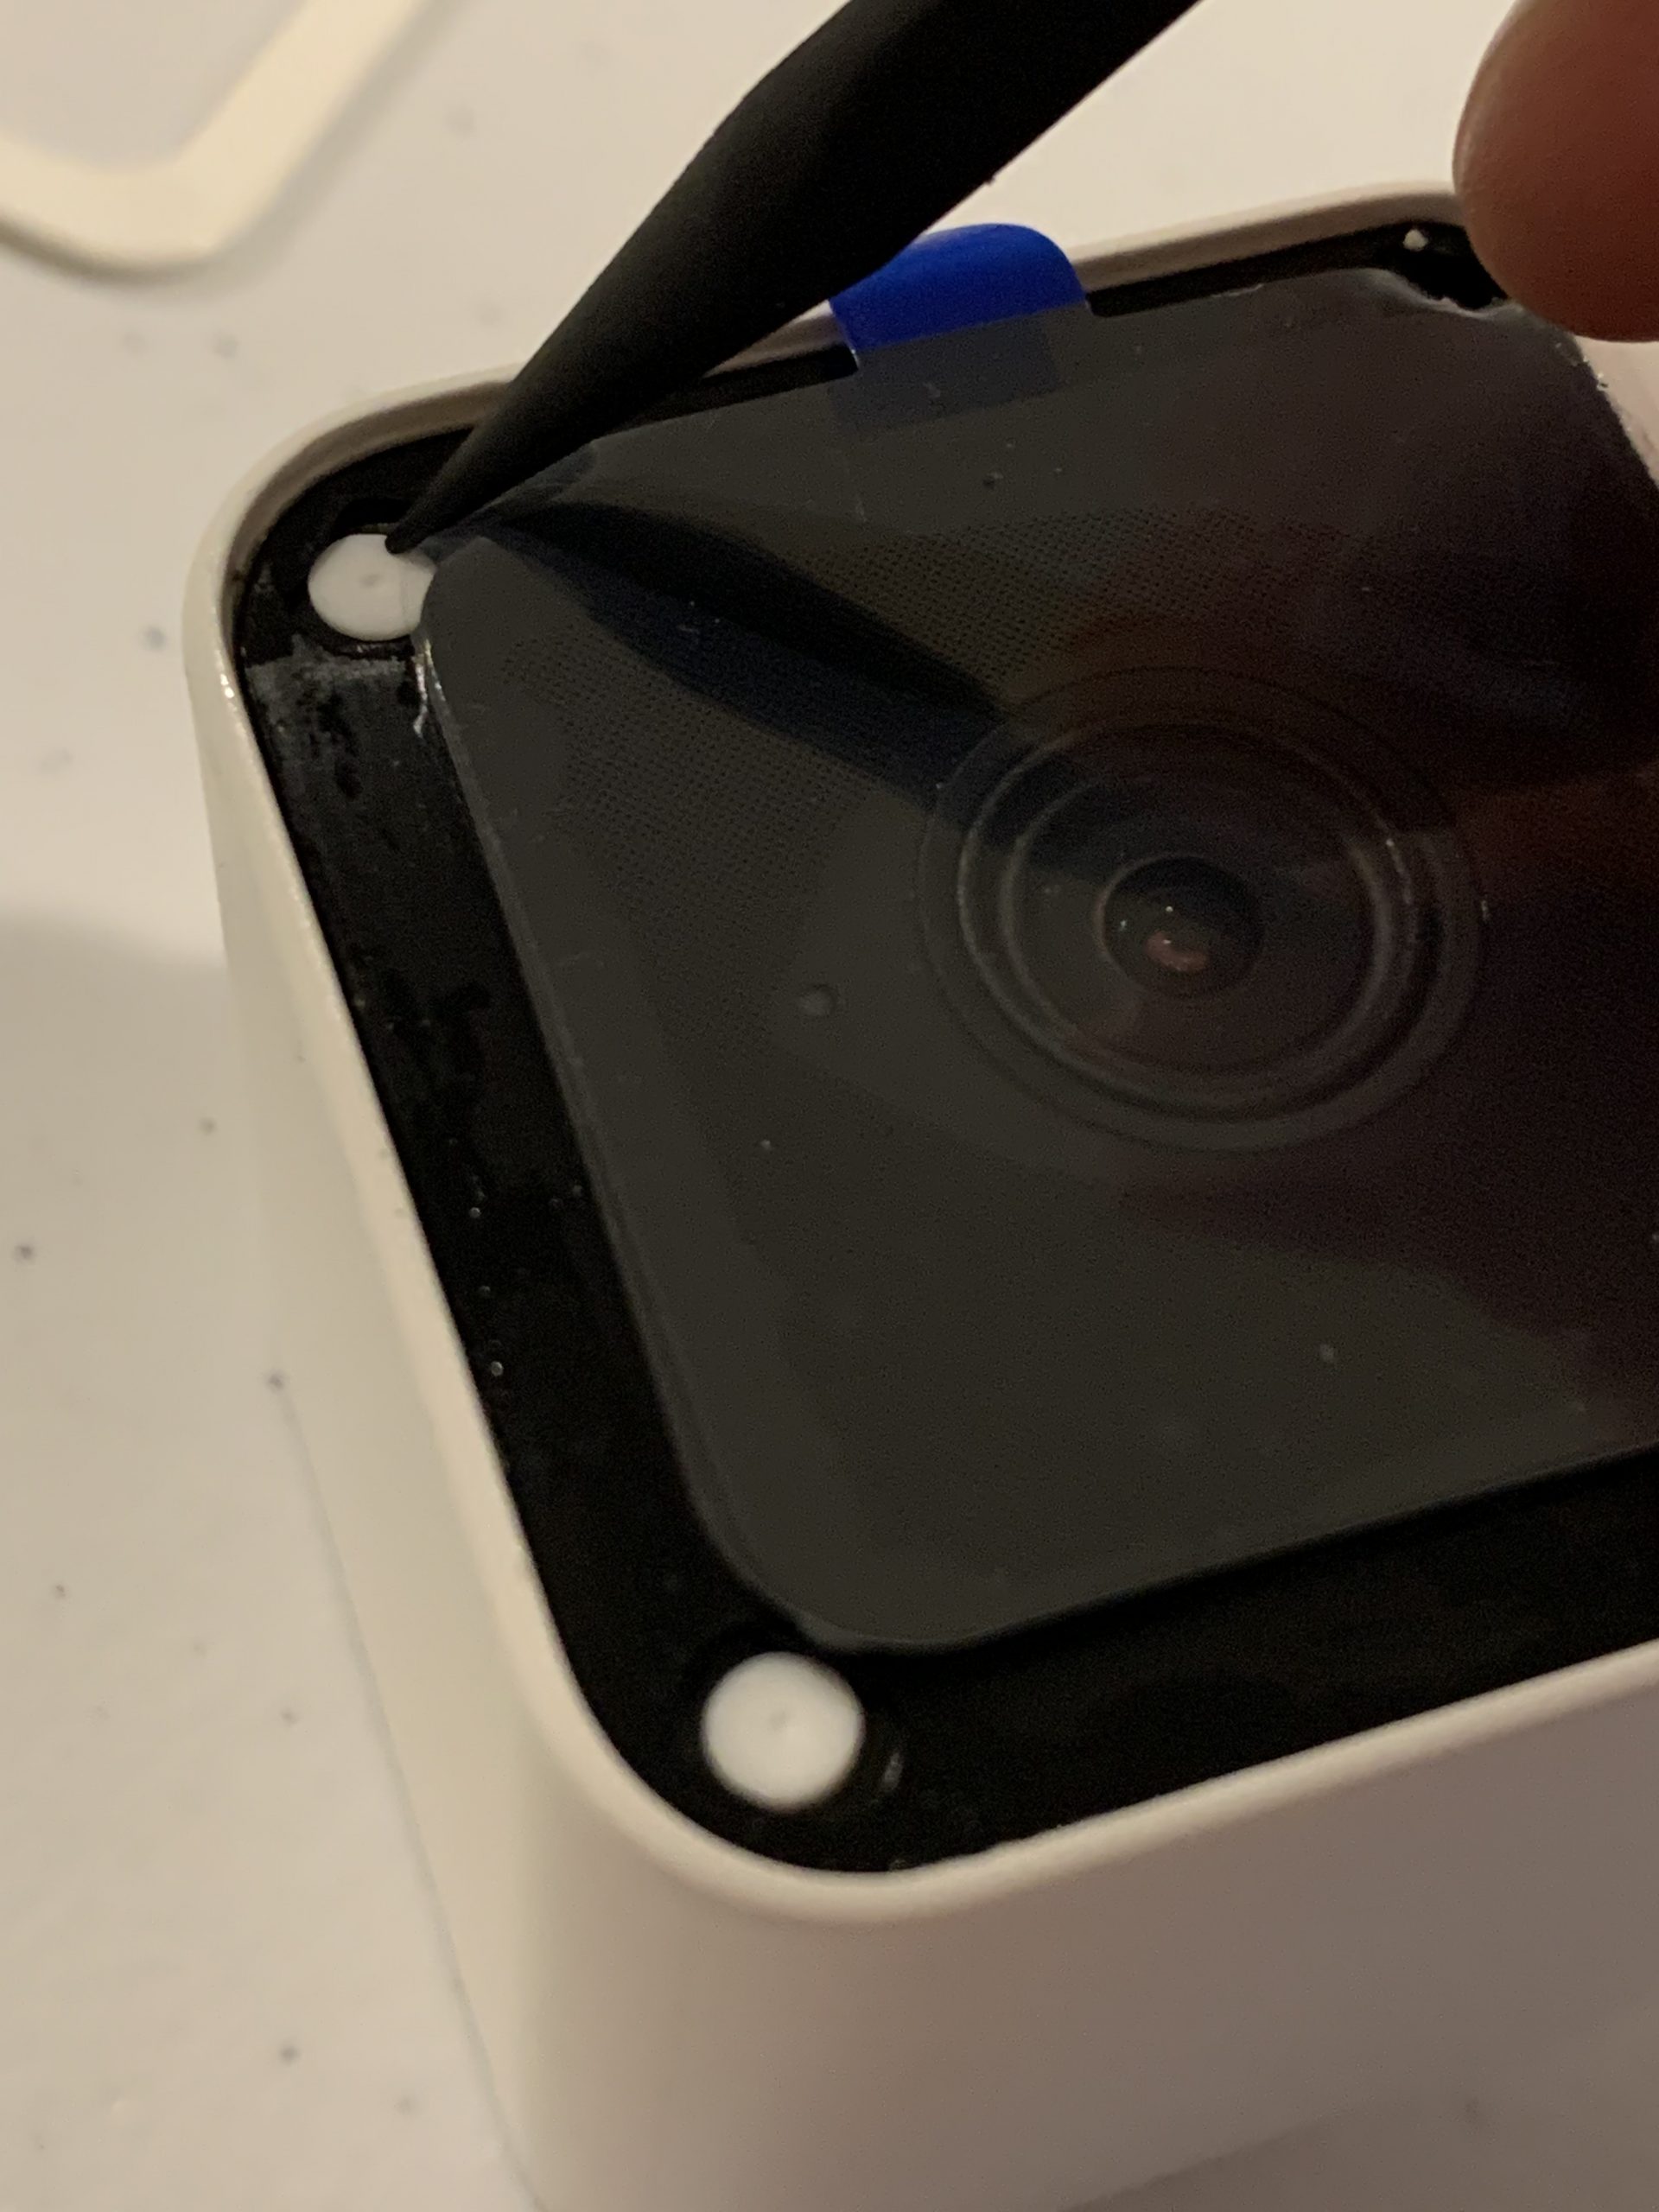
Step 3 – Use the pointy end of the tool to carefully remove the three white inserts. This part is easy – but if you get it wrong it will be VERY hard to get the underlying screws out! Tip: push on the far side of the squishy insert to cause it to rotate, then you can carefully tweezer it out.
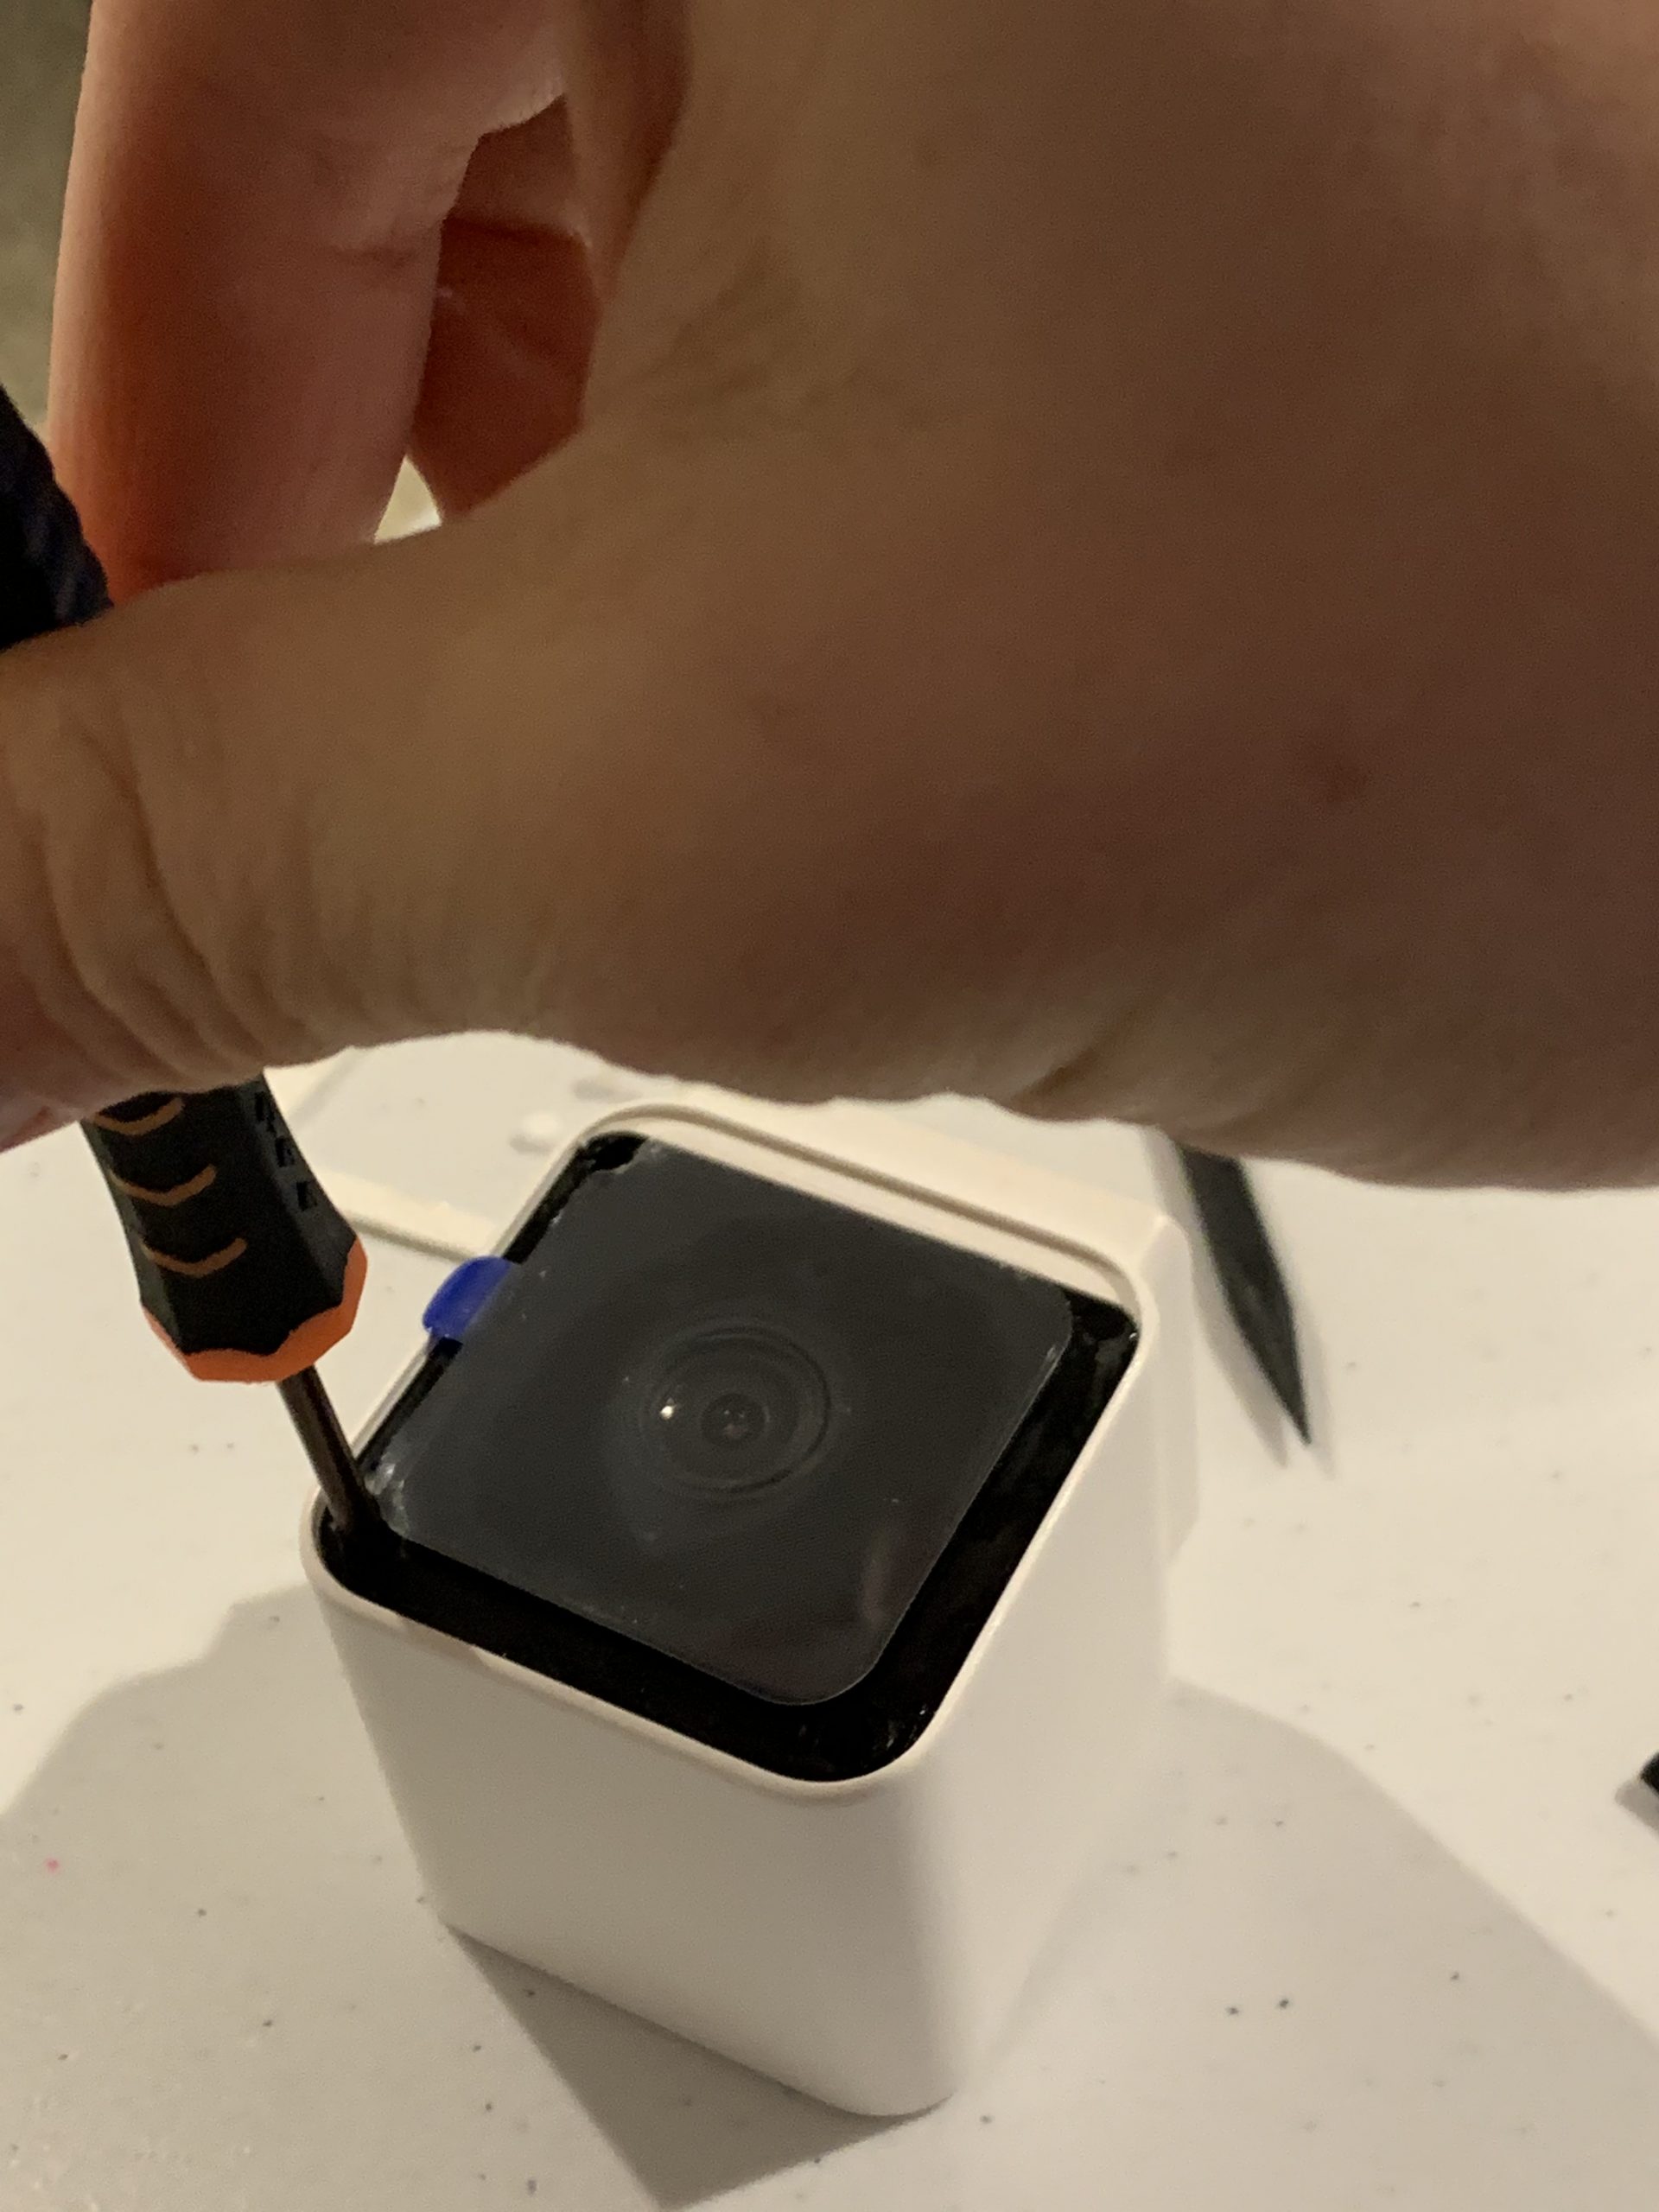
Step 4 – Use a small screwdriver to loosen the three phillips screws. Yes – only three; if Wyze had a fourth hole and screw the price would be much higher.
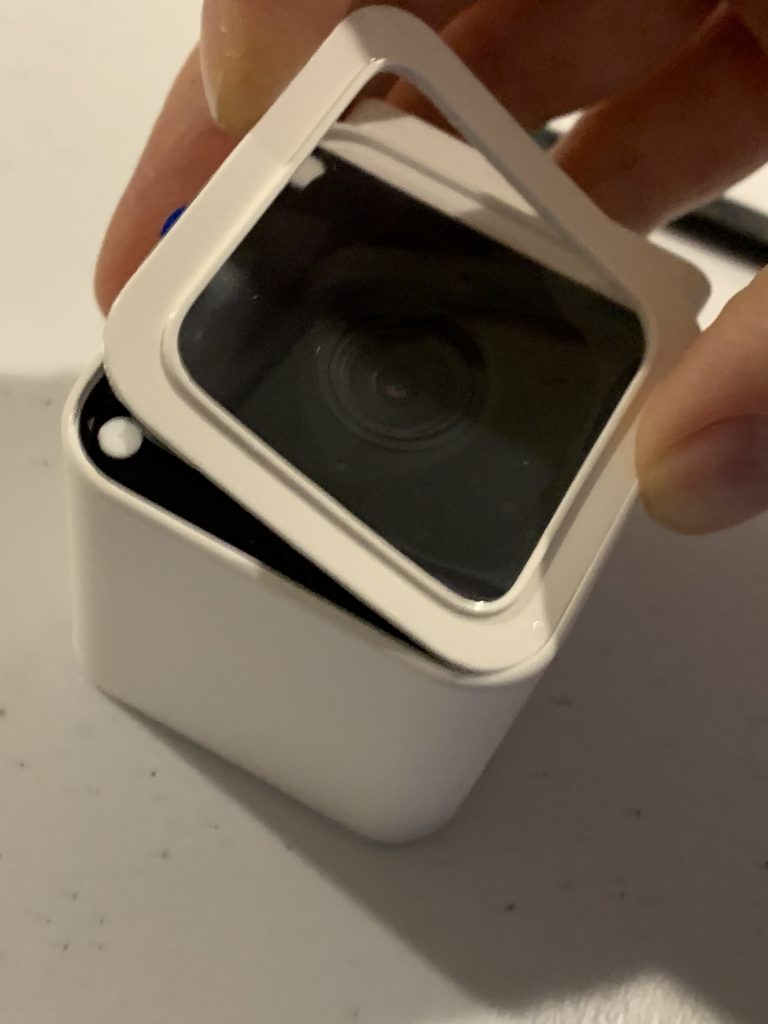
Step 5 – Carefully insert the spudger in between the white case and the black front. This is the trickiest part! You don’t want to damage the red moisture seal just underneath the black front. To avoid damaging it, do not repeatedly pry at the black front – instead get the tool just under the edge and lift.
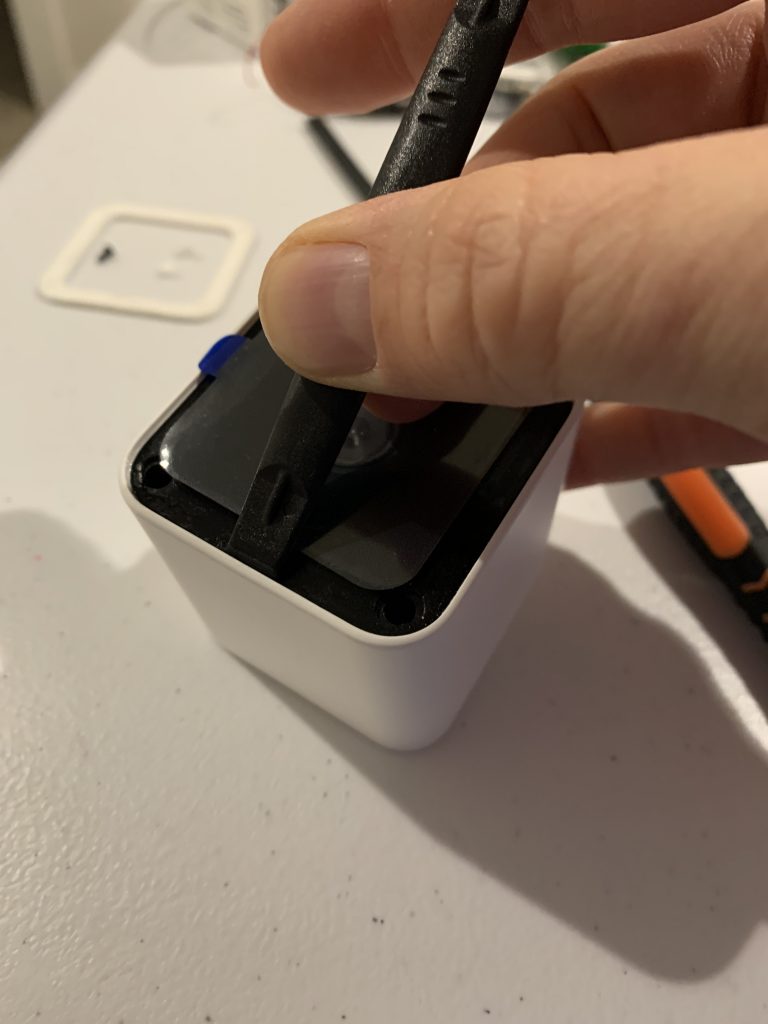
Insert the spudger, as in the previous step, carefully working out the black portion. 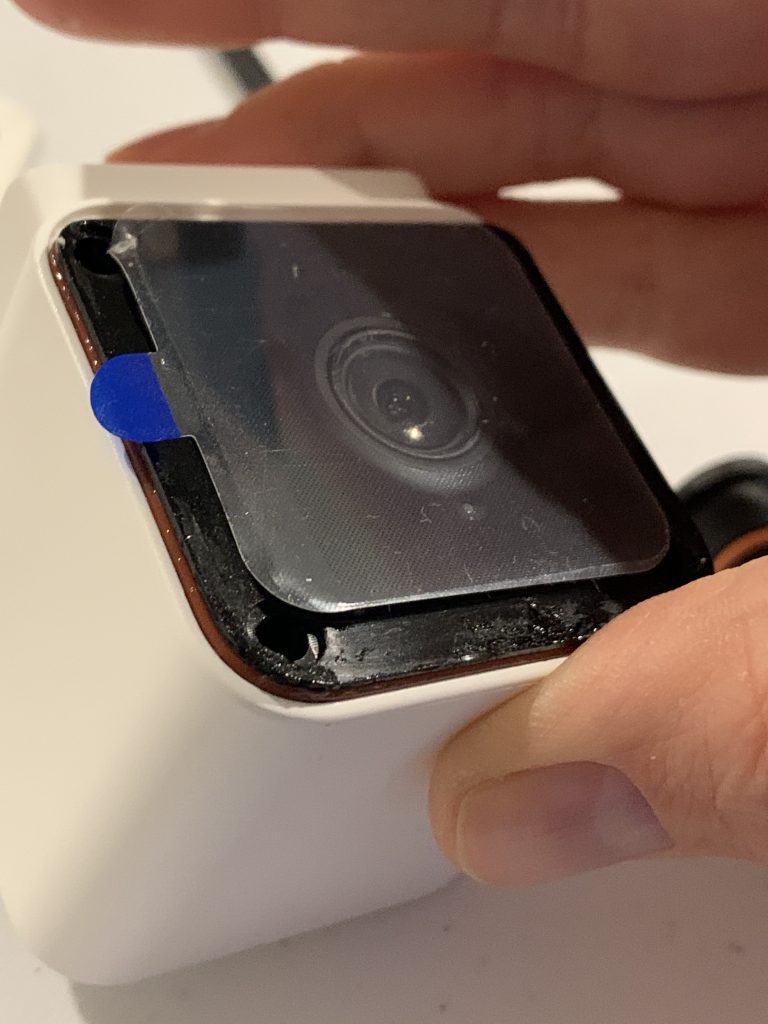
As you lift the black part up you will note the red seal just under the black edge. Careful! It punctures easily


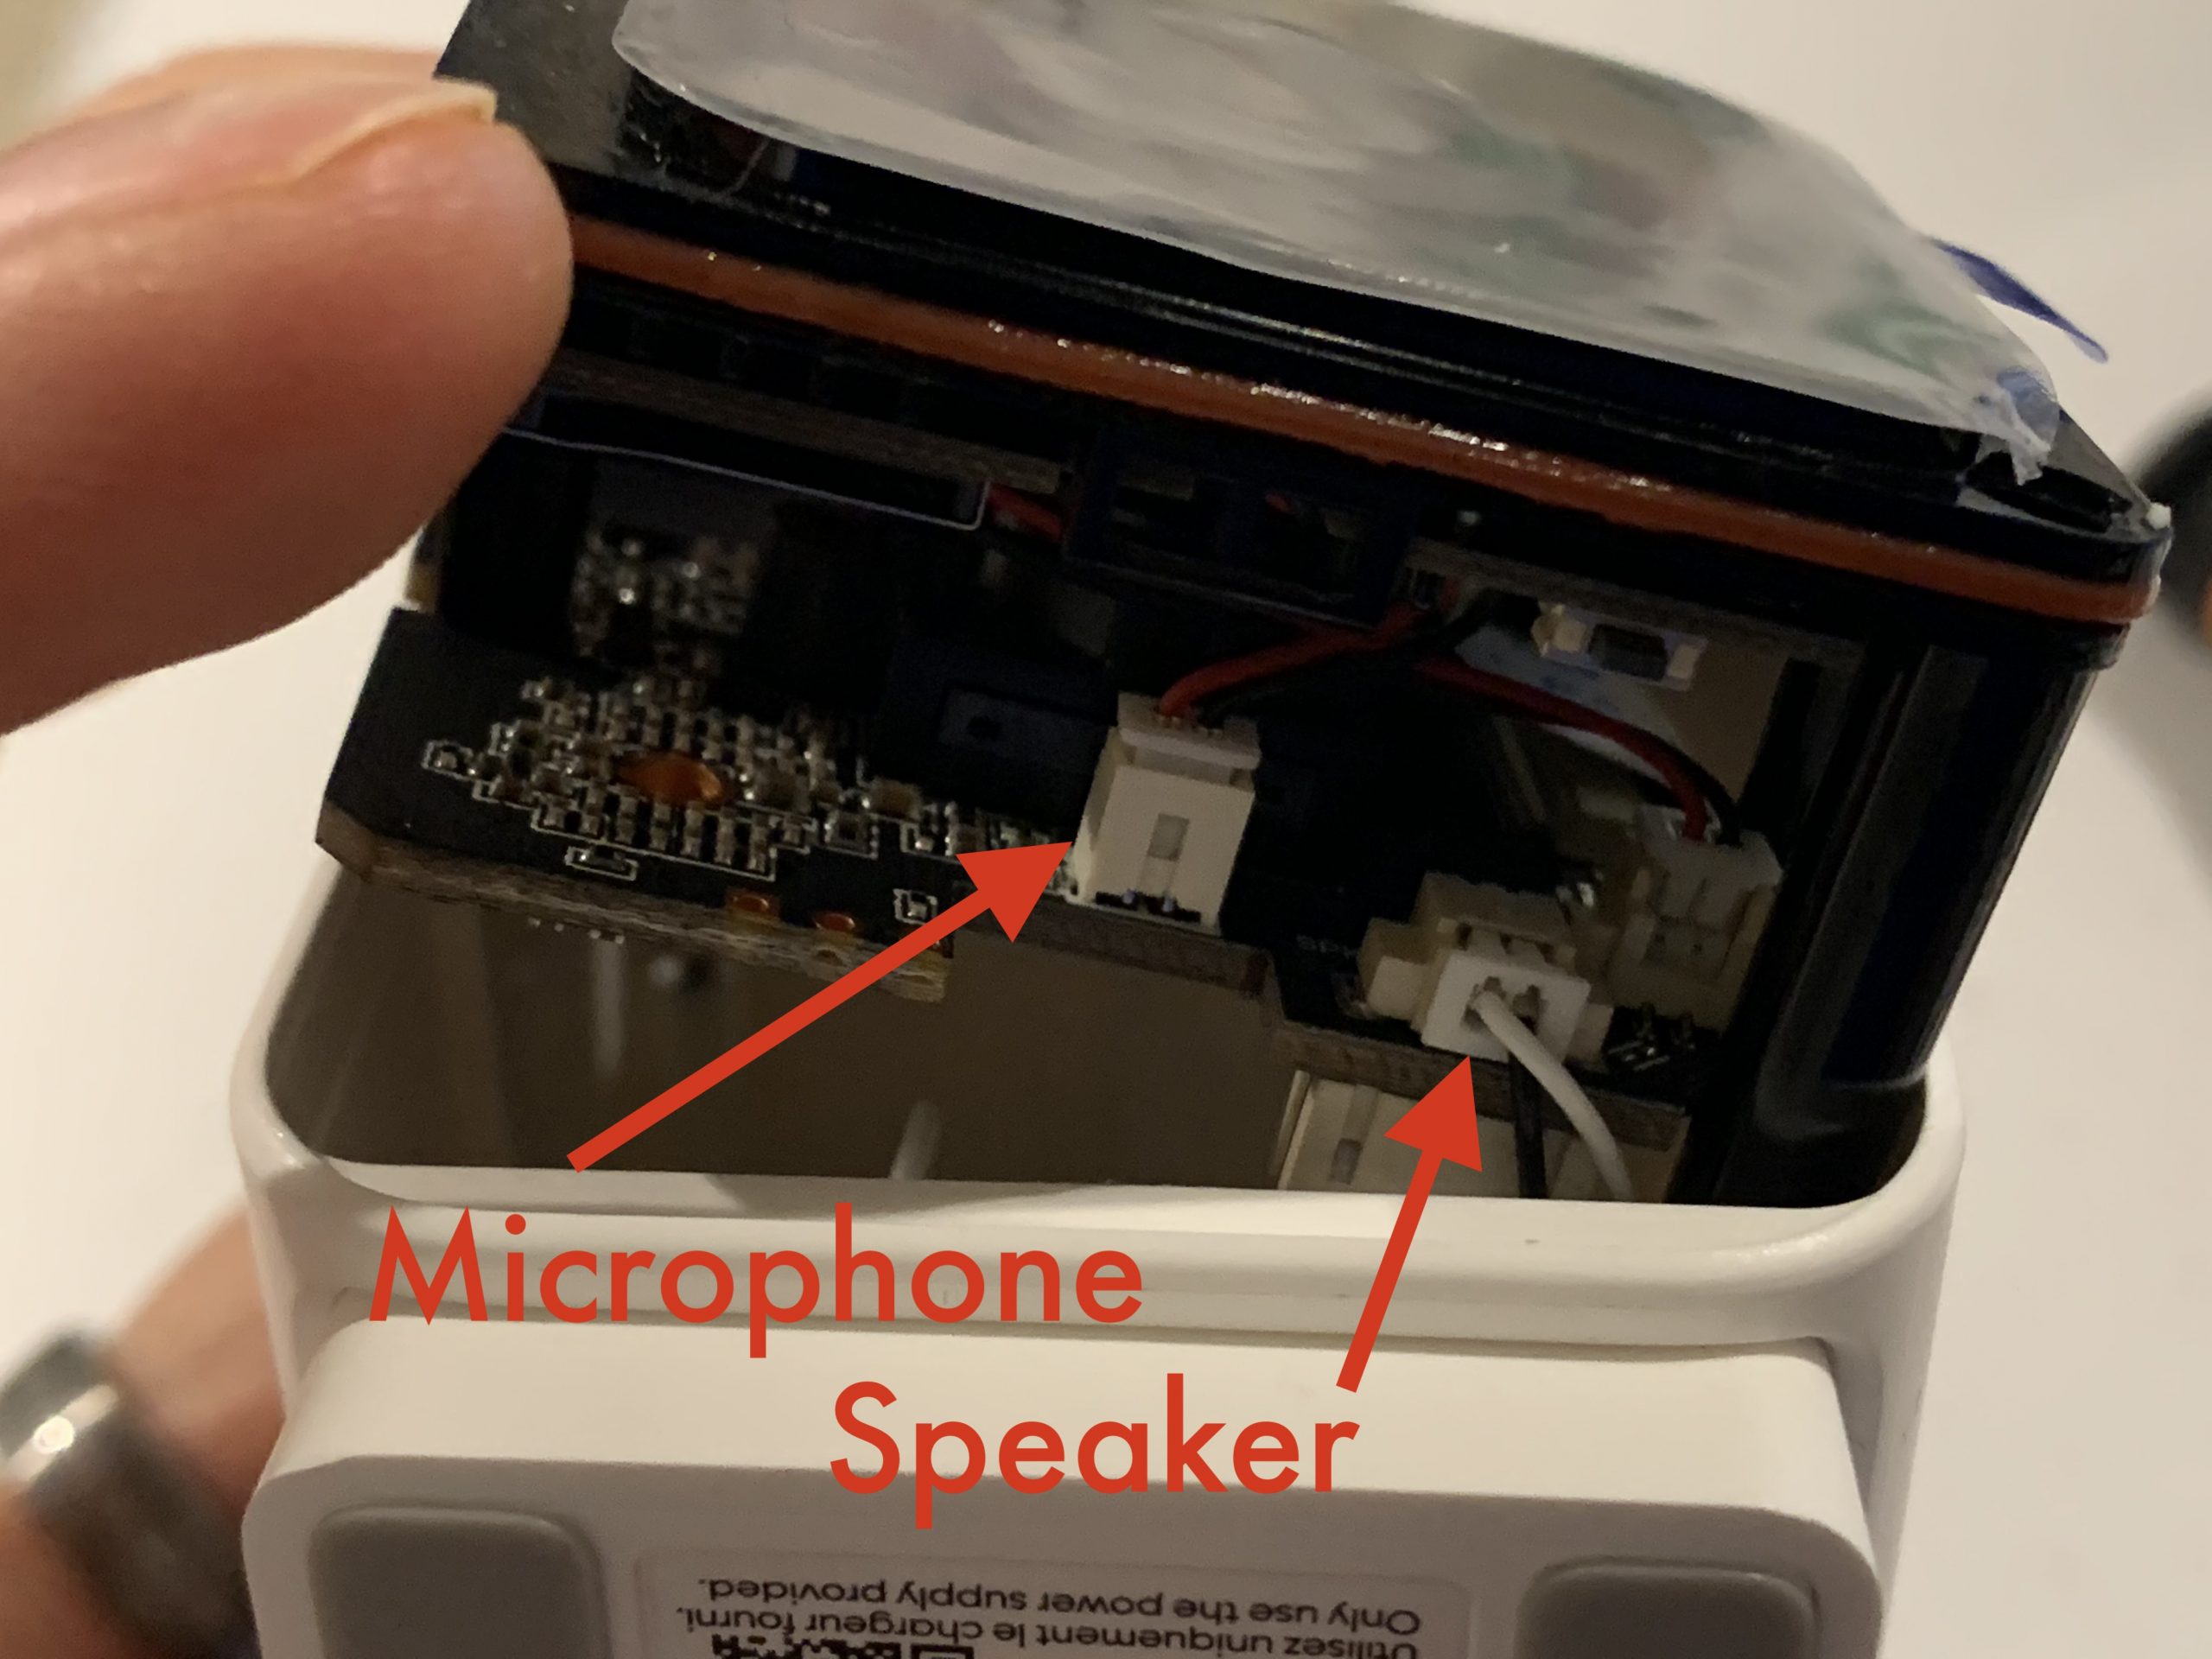
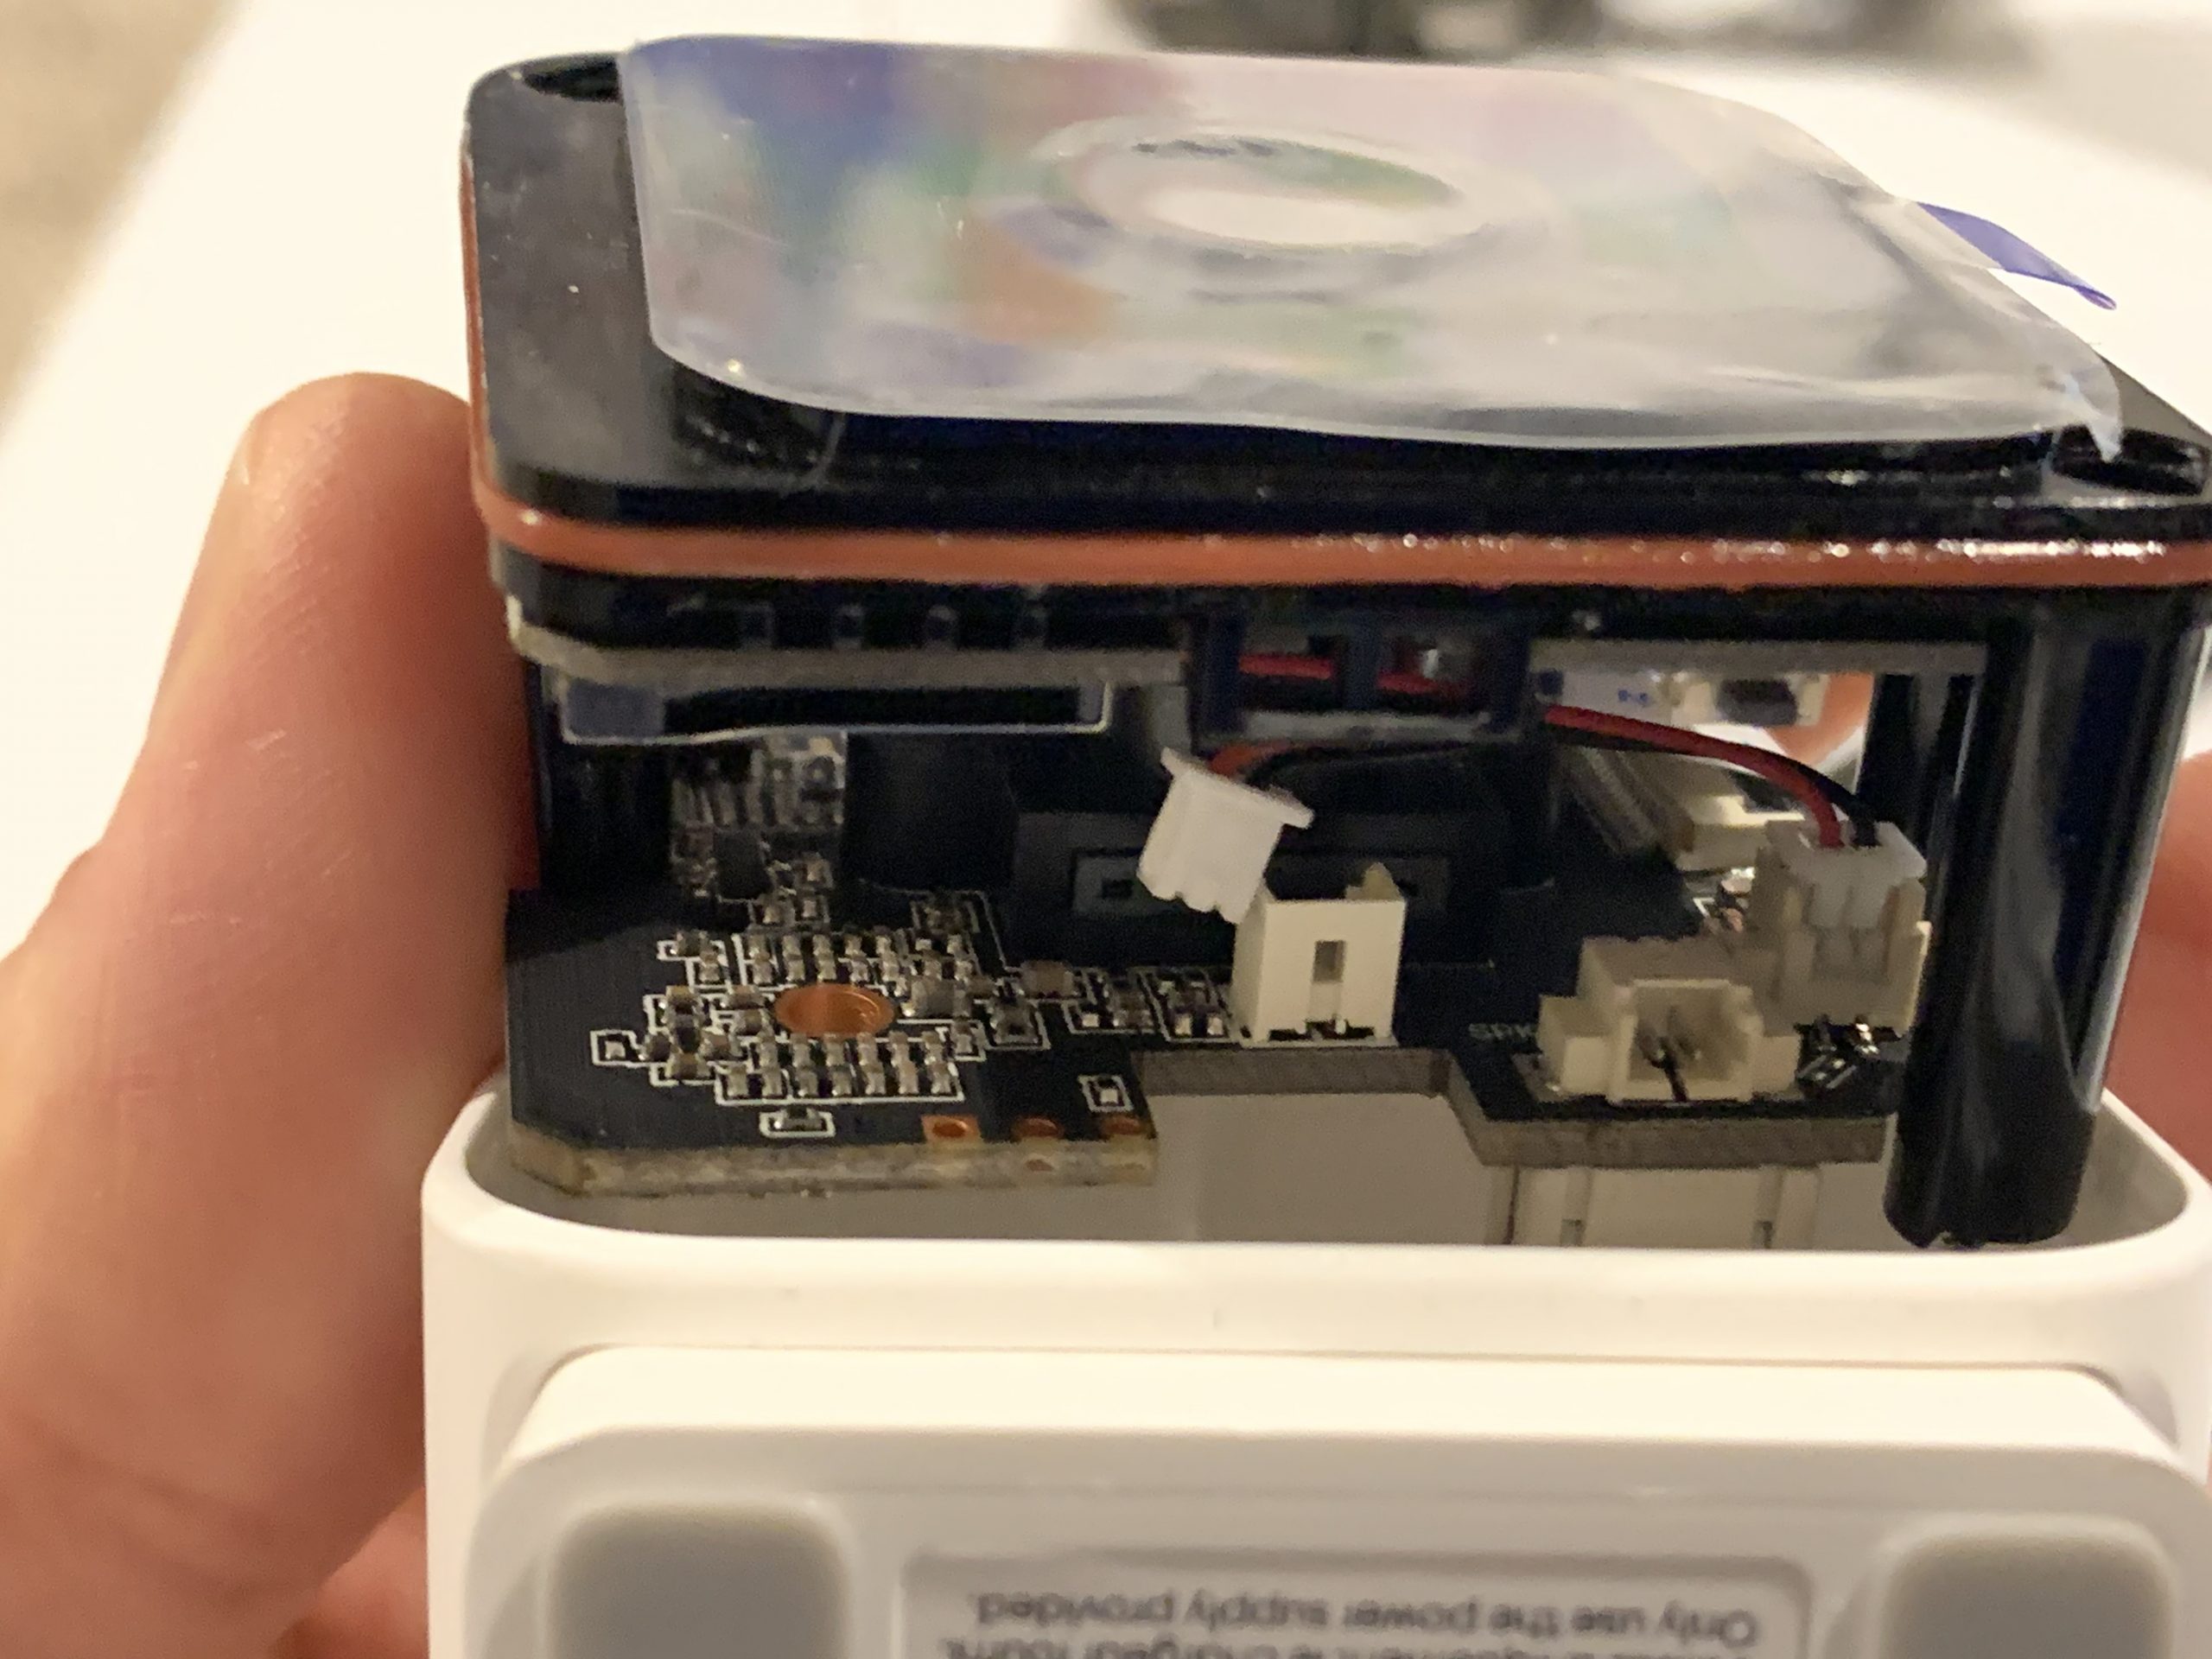
Step 6 – Once you have carefully lifted out the black portion the electronics slide out easily. The mic and speakers are on the bottom of the assembly. You can use the tool to carefully loosen the connectors. This should allow easy reconnection if desired later.
Step 7 – Reassmebly. Push the assembly back in the case. Insert the three screws and tighten. Carefully push the white inserts. Re-attach the white rim.