For my wife’s Spell To Write and Read (SWR) homeschooling we have a bunch of scanned worksheets. A sample of the scanned image is shown below:
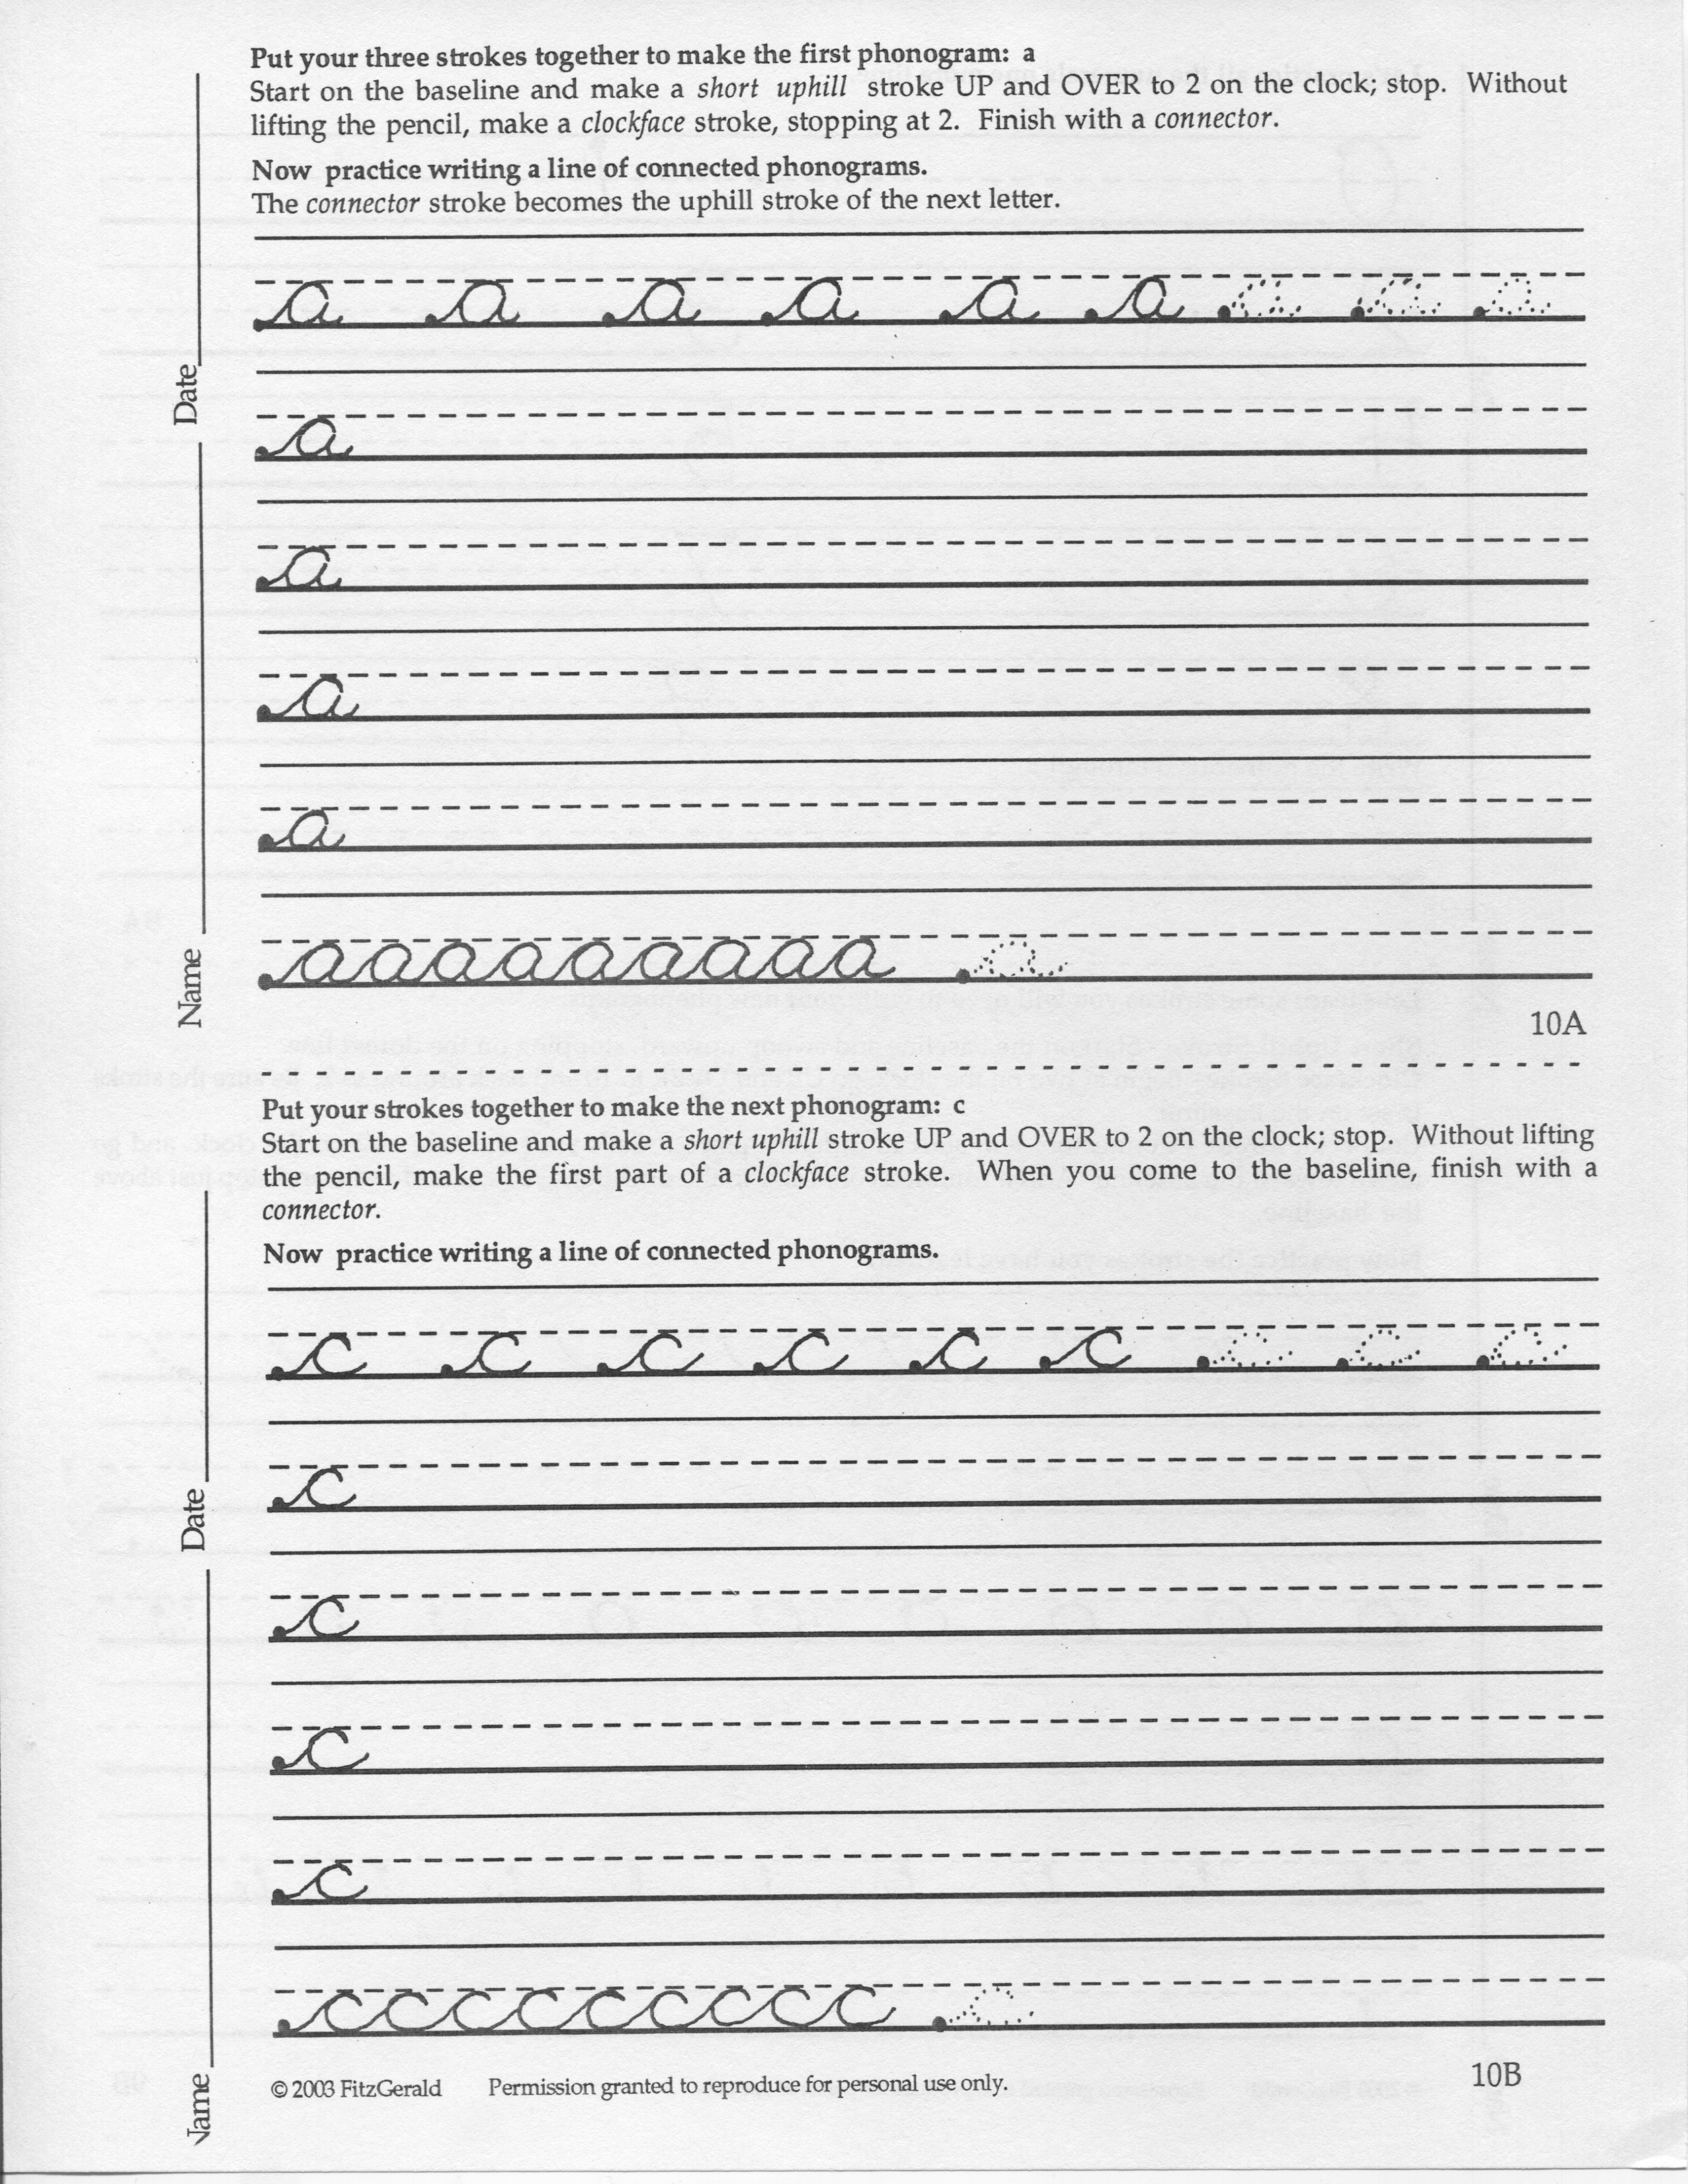
As you can see its entirely readable and fine for our purposes. However it is not gentle on our laser printer toner budget. What we really want is the background to be white, and the foreground to be black – nothing inbetween. This process is called binarization – and scanner software often has a feature that lets you do this during scantime.
We didn’t use that feature (or maybe our software didnt support it) at scantime. As such we need to resort to postprocessing. I have a Master’s in computer graphics and vision, and everytime I use something I learned the value of that degree goes up. It therefore behoves me to use it every chance I get.
As a good computer vision student, when I think binarization my mind jumps straight to Otsu! He came up with a great way of automatically determining a good threshold value (meaning, when we look at each pixel in the image, everything below a value turns black, all else turns white).
My first thought is to check for an easy button somewhere. In gimp, for example, I found you can load the image, click on “Image -> Mode -> Indexed” then select “Use black and white (1 bit)”. Looks ok!
Now how to automate this, given I have 60+ images? Turns out there is a threshold option in imagemagick. I could go through each image in the directory and manually threshold, but I might get the threshold wrong, and I don’t really want to train my wife on picking a threshold value. Plus I know Otsu is better!
Turns out some guy named Fred has a bunch of ImageMagick scripts, including an Otsu one. I downloaded his script and ran it, yielding the following image:
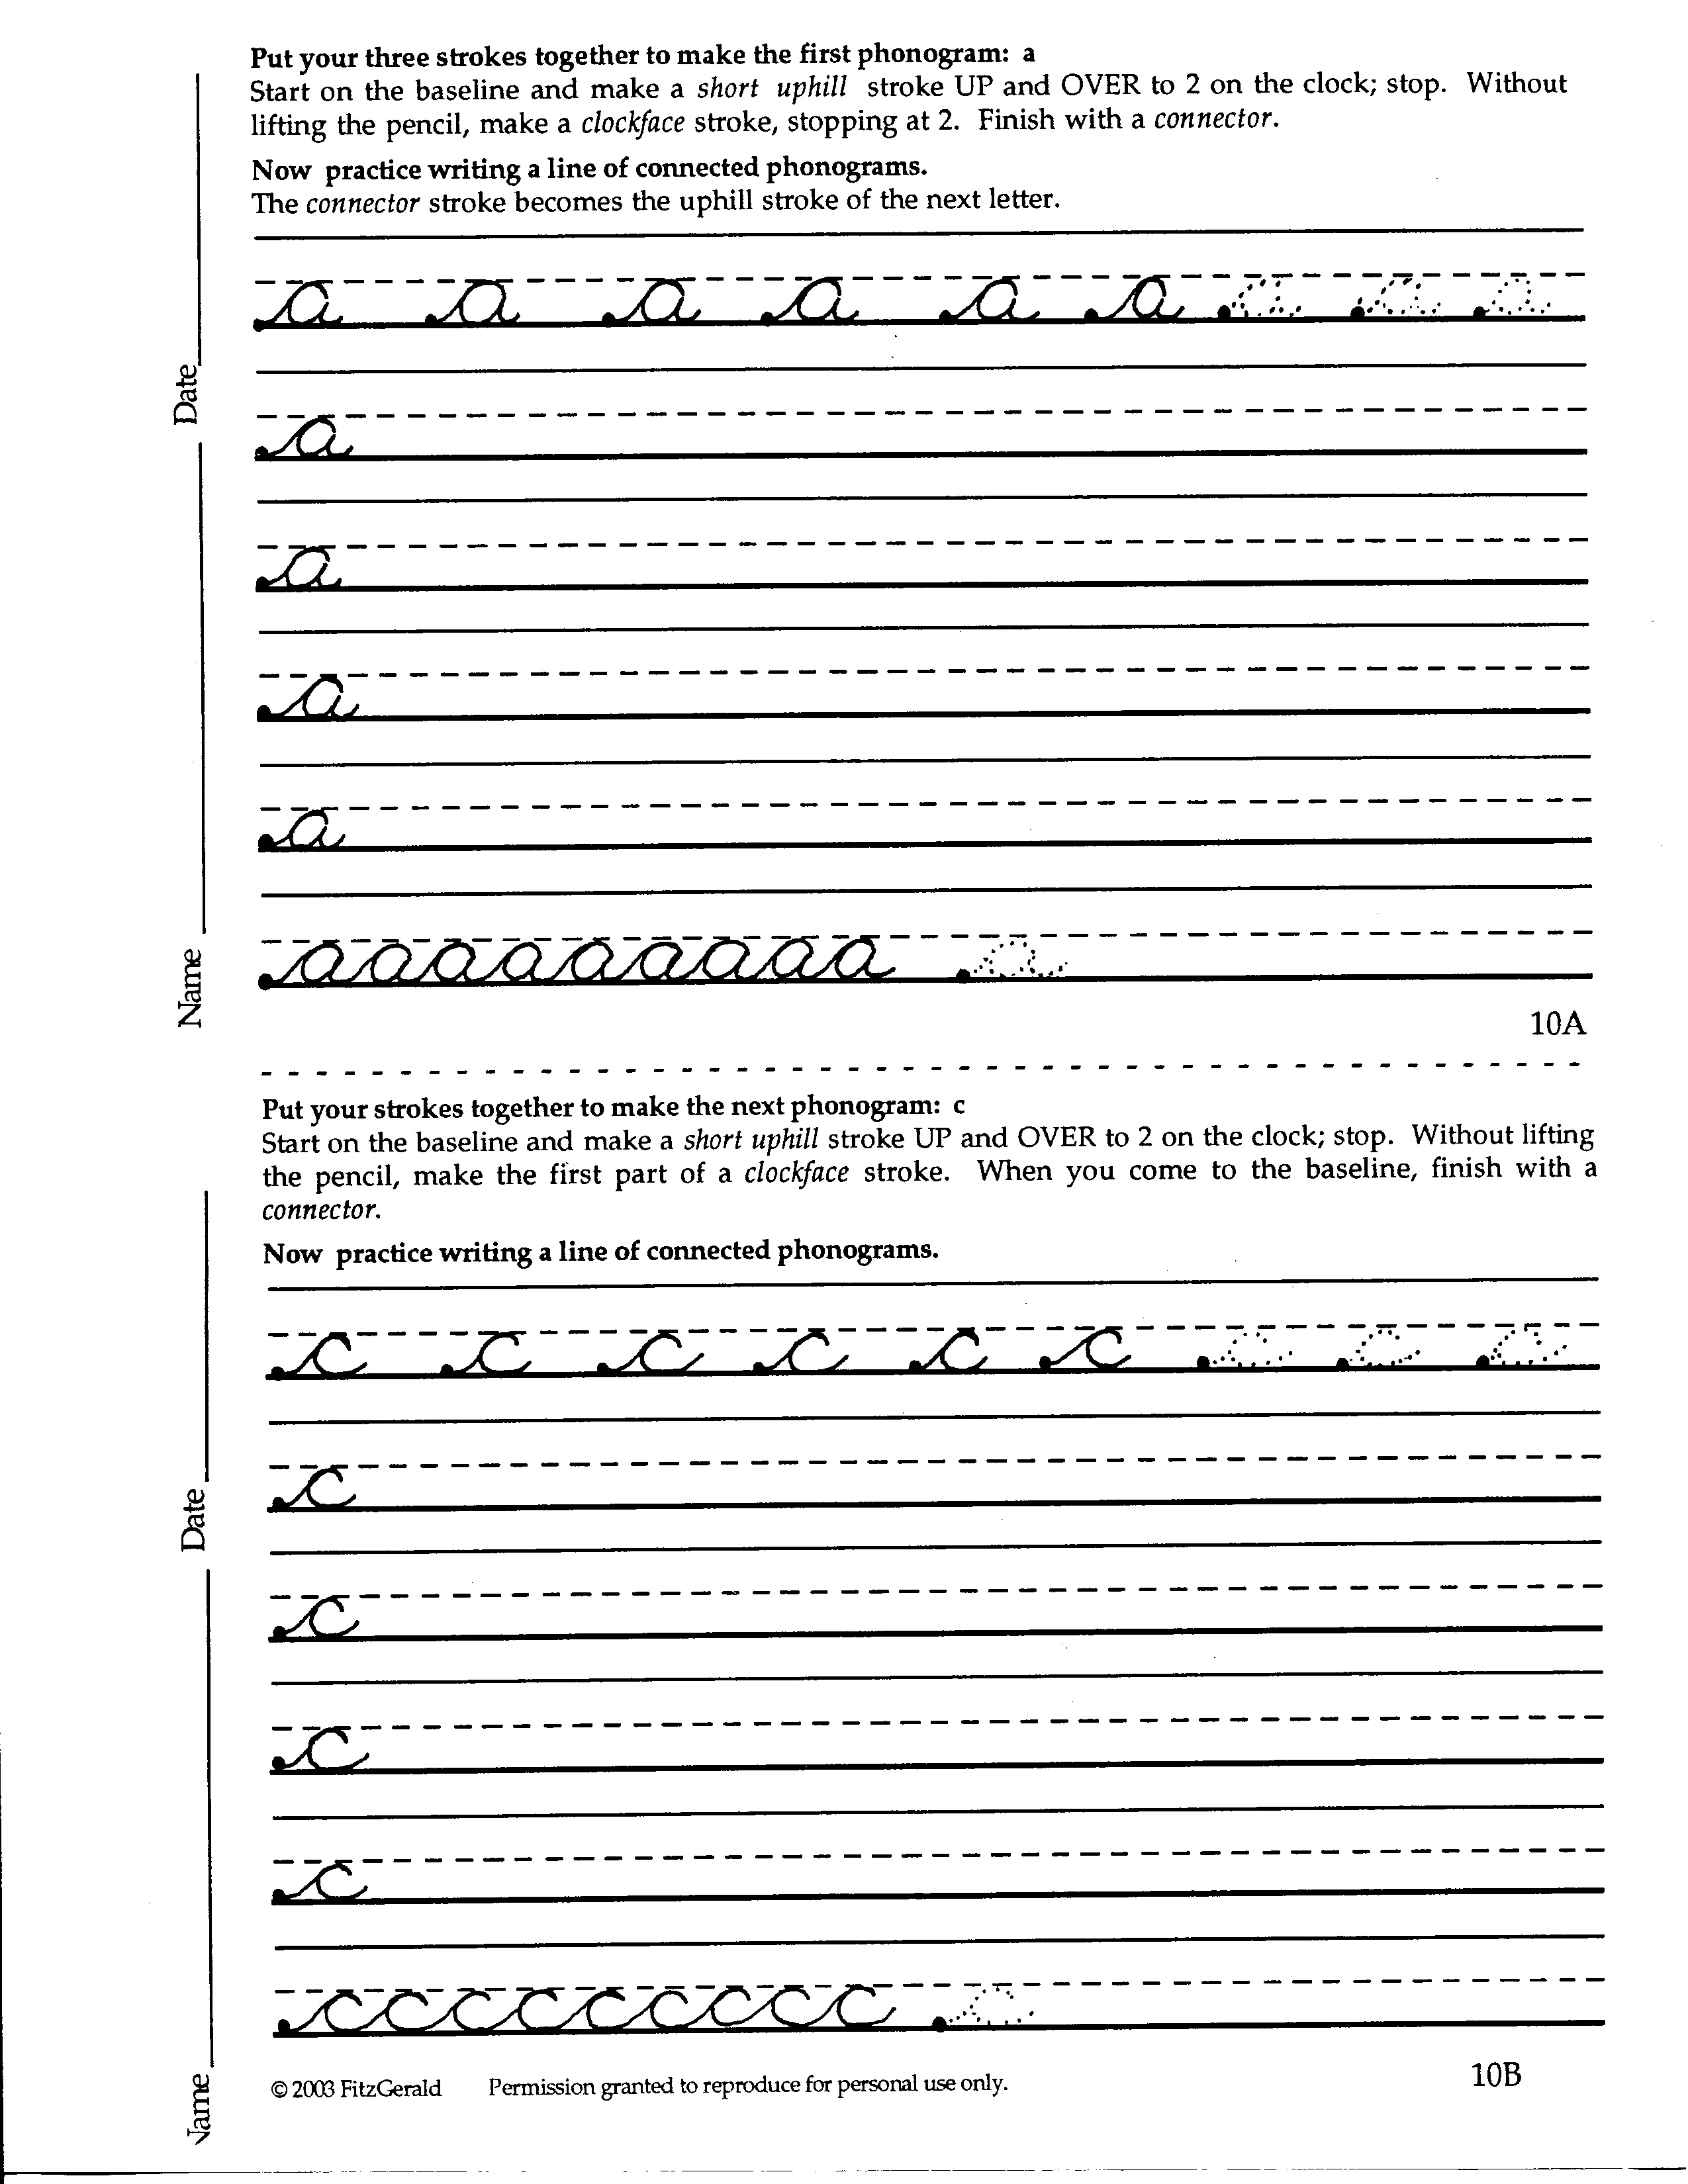
Pretty nice – just black and white. Thanks Fred… sorry I cannot call him “Fast Freddy” since it took around 18 seconds per image. I know we can do better! Time to dust off those computer vision skills of Master.
Here’s what I came up with using python/opencv:
[python]
#!/usr/bin/python
import cv2
import sys
img=cv2.imread(sys.argv[1],0)
ret,imgThresh=cv2.threshold(img, 0, 255, cv2.THRESH_OTSU)
cv2.imwrite(sys.argv[2], imgThresh)
[/python]
Short and sweet! And performance is way better: about 3 seconds per image. But it looks like most of the program runtime is spent loading cv2. Based on that assumption I decided to add a bulk processing mode:
[code language=”python” wraplines=”false” collapse=”false”]
import cv2
import sys
if len(sys.argv) == 1 or "-h" in sys.argv:
print "Usage: %s [-inplace] image1 [image2 [image 3 …]]"
print " %s inImage outImage"
sys.exit(0)
if "-inplace" == sys.argv[1]:
inOut = [ (arg, arg) for arg in sys.argv[2:] ]
else:
inOut = [ (sys.argv[1], sys.argv[2]) ]
for inImage, outImage in inOut:
print "Converting %s to %s" % (inImage, outImage)
img=cv2.imread(inImage,0)
ret,imgThresh=cv2.threshold(img, 0, 255, cv2.THRESH_OTSU)
cv2.imwrite(outImage, imgThresh)
[/code]
When I run this script on the whole directory it takes an average of 2 seconds per image. Better, but longer than needed. What gives? It turns out I have all my data on a QNAP and opening, reading, and writing lots of files is not its forte. When I copy the data to my local SSD on the MAC, the cost per image is now 140ms. Much better.
Since, as often happens, I have found my assumptions totally flawed, can I vindicate Freddy? After rerunning the test it appears he is still a “steady Freddy” at about 2.7 seconds when running straight on the hard drive. Sorry Fred; opencv just beat the pants off you.